

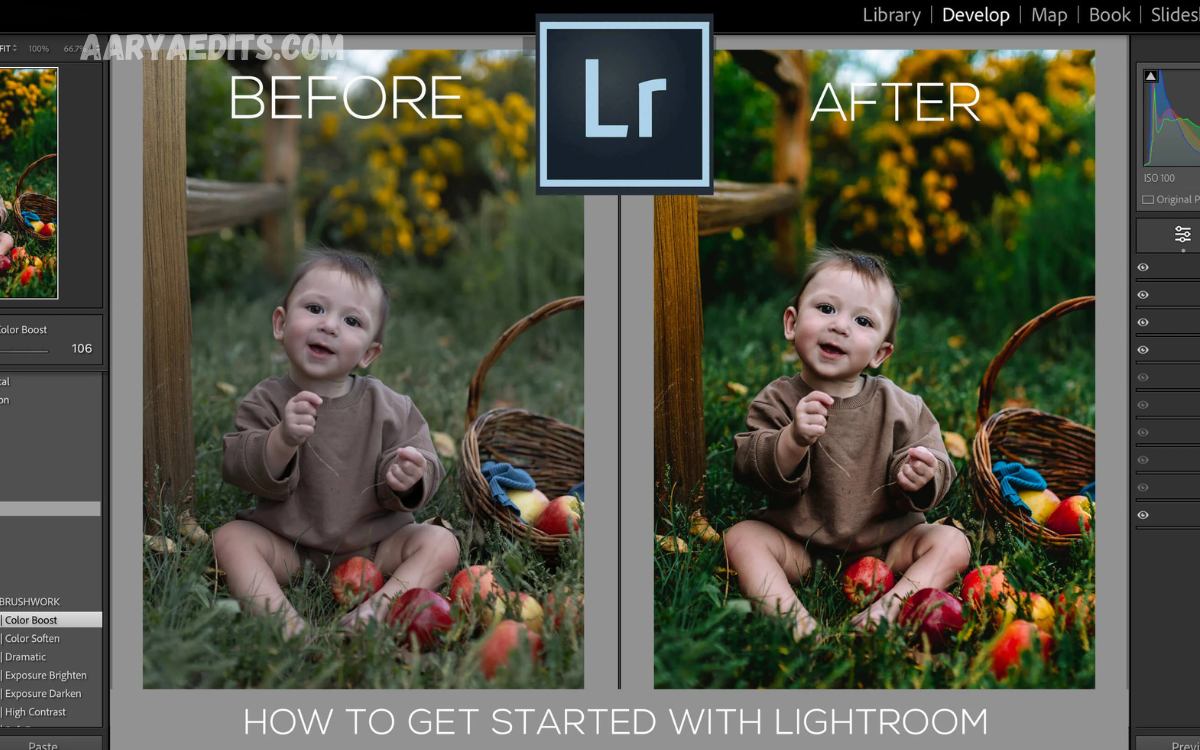
Adobe Lightroom preset settings are saved editing adjustments that can be applied to photographs with a single click. A preset can contain changes to exposure, contrast, highlights, shadows, white balance, color, clarity, texture, sharpness, and other editing controls.
Presets are useful because they provide a consistent starting point for photo editing. Instead of adjusting every image from scratch, photographers can apply a suitable preset and then make small corrections based on the lighting, subject, and their personal style.
Why Lightroom Presets Are Useful?
One of the biggest advantages of Lightroom presets is speed. When working with many photographs from the same event, travel session, wedding, or photoshoot, a suitable preset can create a consistent appearance across the entire collection.
Presets can also help beginners understand how professional edits are created. By examining the settings inside a preset, users can learn how exposure, contrast, colors, shadows, highlights, and other adjustments influence the final appearance of an image.
Understanding the Basic Lightroom Settings
Before using advanced presets, it is important to understand Lightroom’s basic editing controls. Exposure controls the overall brightness, while contrast determines the difference between darker and lighter areas of an image.
Highlights affect bright portions, while shadows control darker areas. Whites and blacks help establish the brightest and darkest points. These controls work together, so changing one setting may require adjustments to another to maintain a balanced image.
Recommended Exposure Settings for Presets
Exposure should be adjusted based on the original photograph rather than following a fixed number. A general preset may allow for a small exposure adjustment, but images captured under different lighting conditions will usually require individual correction.
A useful starting point is to keep exposure close to the original value and make small changes after applying the preset. Avoid excessive brightness, as it can reduce detail in important areas such as faces, clouds, clothing, and reflective surfaces.
Contrast, Highlights, and Shadows Settings
Contrast gives an image more visual separation and can make a photograph appear stronger. Moderate contrast often works well for everyday photography, while dramatic images may benefit from a stronger adjustment.
Highlights and shadows are especially important when creating balanced Lightroom preset settings. Reducing highlights can recover detail in bright areas, while lifting shadows can reveal information in darker portions without making the entire image excessively bright.
White Balance and Temperature
White balance determines whether a photograph appears warm or cool. Temperature moves an image toward yellow and orange tones on the warm side or toward blue tones on the cool side.
A preset should not rely on one temperature value for every photograph because lighting conditions vary considerably. A better approach is to create a consistent color style while allowing temperature and tint to be corrected for each individual image.
Color Settings for Professional Results
Lightroom’s color controls provide significant creative flexibility. Vibrance can strengthen muted colors while generally being more restrained with already-saturated tones, making it useful for many natural-looking edits.
Saturation affects the intensity of all colors and should be used carefully. Excessive saturation can make skin tones appear unnatural and can cause bright objects to lose realism. Professional preset settings generally aim for controlled and harmonious colors rather than maximum intensity.
HSL Settings in Lightroom Presets
The HSL panel lets you adjust Hue, Saturation, and Luminance within individual color ranges. This makes it possible to change specific colors without significantly affecting the rest of the photograph.
For example, greens can be shifted toward a different visual character, blues can become deeper or softer, and orange tones can be adjusted for portraits. HSL settings are particularly useful when developing a recognizable photography style.
Texture, Clarity, and Dehaze
Texture enhances or softens fine details while clarity affects local contrast and can create a stronger sense of definition. Dehaze can increase atmospheric contrast and is often useful for landscapes or images affected by haze.
These controls should be used carefully in portrait photography. Too much clarity or texture can emphasize skin imperfections, while excessive dehaze can create harsh-looking photographs. Balanced settings usually produce more professional results.
Sharpening and Noise Reduction
Sharpening improves the perception of detail, but the correct amount depends on image resolution, camera settings, and the intended output. Applying too much sharpening can introduce unwanted edges and make an image appear artificial.
Noise reduction is useful for photographs captured at high ISO settings. A preset can include moderate noise reduction, but it is better to adjust it for each image, as low-light photographs can contain very different amounts and types of noise.
Lightroom Preset Settings for Portraits
Portrait presets usually focus on natural skin tones, controlled contrast, soft highlights, and attractive color balance. Orange and red tones often require careful adjustment because they strongly influence the appearance of human skin.
A professional portrait preset should enhance the subject without making the face look overly smooth or heavily processed. Moderate texture, balanced exposure, gentle contrast, and carefully controlled colors can create a clean and timeless portrait style.
Lightroom Preset Settings for Landscapes
Landscape photographs often benefit from stronger detail, controlled highlights, and improved color separation. Blue skies, green vegetation, mountains, water, and clouds can all respond differently to editing adjustments.
A landscape preset may use moderate contrast, carefully managed highlights, enhanced texture, and selective HSL adjustments. However, the final settings should always reflect the original lighting conditions and the photographer’s desired mood.
Lightroom Preset Settings for Mobile Photography
Mobile photographs can vary significantly because smartphones use different cameras and computational photography systems. A preset that looks excellent on one phone’s image may appear too bright, too dark, too colorful, or too contrast-heavy on another.
For mobile editing, simple presets with moderate adjustments to exposure, contrast, color, and sharpening are often easier to adapt to. After applying the preset, review the image and make small corrections rather than expecting it to produce a perfect result automatically.
Read Also: Professional Lightroom Editing Presets for Stunning Photo Enhancements
Creating Your Own Lightroom Preset
Creating a personal preset begins by editing a single photograph until the desired style is achieved. Adjust the basic panel first, then refine color, HSL, effects, detail, and other controls as needed.
Once the edit looks consistent and intentional, save the settings as a preset. Give it a descriptive name based on its purpose, such as Natural Portrait, Warm Travel, Soft Outdoor, or Clean Street. This makes it easier to identify and reuse later.
How to Apply Lightroom Presets Correctly
After selecting a preset, always examine exposure and white balance first. These two areas can vary significantly between photographs and may require immediate correction.
Next, check skin tones, highlights, shadows, colors, and overall contrast. The goal of a preset is not to eliminate editing but to provide a strong starting point that can be customized efficiently for each photograph.
Common Mistakes When Using Presets
One common mistake is applying a preset and leaving every setting unchanged. Presets are designed to provide a particular editing style, but photographs differ in lighting, exposure, color, and subject matter.
Another mistake is using excessive adjustments. Heavy saturation, extreme clarity, crushed shadows, bright highlights, or unnatural skin tones can quickly reduce image quality. Subtle editing often produces a more polished and professional appearance.
How to Make Presets Look More Natural
Natural-looking Lightroom edits depend on moderation and consistency. Instead of dramatically changing every slider, focus on creating a balanced relationship between brightness, contrast, color, and detail.
It is also helpful to compare the edited photograph with the original version. This makes it easier to identify whether the preset has genuinely improved the image or simply added a stronger visual effect.
Organizing Your Lightroom Presets
A growing preset collection can become difficult to manage without proper organization. Group presets by purpose, such as portraits, landscapes, weddings, travel, black-and-white, cinematic, or social media photography.
Clear naming also saves time. Avoid names that provide no information about the preset’s purpose. A simple, descriptive naming system allows photographers to quickly locate suitable Adobe Lightroom presets during large editing projects.
Adjusting Presets for Different Lighting
Lighting is one of the most important factors when adapting presets. A preset created for bright outdoor sunlight may not work correctly on an indoor photograph with warm artificial lighting.
After applying a preset, examine exposure, temperature, tint, highlights, and shadows. Correcting these settings first can make the remaining adjustments much easier and can help preserve the intended visual style.
Presets and Professional Photography Workflows
Presets can become an important part of a professional editing workflow because they reduce repetitive work. Photographers can establish a consistent visual foundation and then customize individual images when necessary.
For large collections, presets can also improve consistency between photographs. However, professional results still require careful review because no single preset can automatically account for every camera, lens, lighting condition, composition, and subject.
Frequently Asked Questions
What are Adobe Lightroom preset settings?
Adobe Lightroom preset settings are saved editing adjustments that can be applied to photographs. They can include exposure, contrast, color, HSL, effects, sharpening, and other Lightroom controls.
Are Lightroom presets good for beginners?
Yes. Presets can give beginners a useful starting point and help them understand how different editing adjustments affect an image. Beginners should still learn the purpose of individual sliders.
Can I create my own Lightroom presets?
Yes. You can edit a photograph until you achieve the desired appearance and save the selected adjustments as a custom preset for future use.
Should exposure be included in a Lightroom preset?
Exposure can be included, but it may need to be adjusted after applying the preset. Different photographs often have varying brightness levels due to changing lighting conditions.
Which Lightroom settings are most important?
Exposure, white balance, contrast, highlights, shadows, whites, blacks, and color are among the most important settings for establishing a strong foundation for an edit.
Are presets suitable for portrait photography?
Yes. Portrait presets can help create consistent color and contrast while reducing editing time. Skin tones should always be checked carefully after applying a preset.
Can Lightroom presets work on mobile photos?
Yes. Lightroom presets can be useful for mobile photographs, though adjustments may be necessary, as smartphone cameras and lighting conditions vary significantly.
Why does my preset look different on every photo?
Presets apply the same saved adjustments to photographs with different exposures, white balances, lighting, and colors. Individual corrections are often necessary to achieve consistent results.
Can presets make photos look professional?
Presets can provide a professional starting point, but the final quality depends on the original photograph and additional adjustments. Good editing requires balance rather than simply applying a preset.
How can I avoid an over-edited appearance?
Use moderate adjustments and regularly compare the edited photograph with the original. Pay particular attention to skin tones, saturation, contrast, highlights, shadows, and excessive clarity.
Conclusion
Adobe Lightroom preset settings can make photo editing faster, more consistent, and more creative when they are used correctly. A good preset provides a reliable foundation while still allowing photographers to make individual corrections for exposure, color, lighting, and subject matter.
The best approach is to understand what each Lightroom control does rather than relying entirely on presets.
