

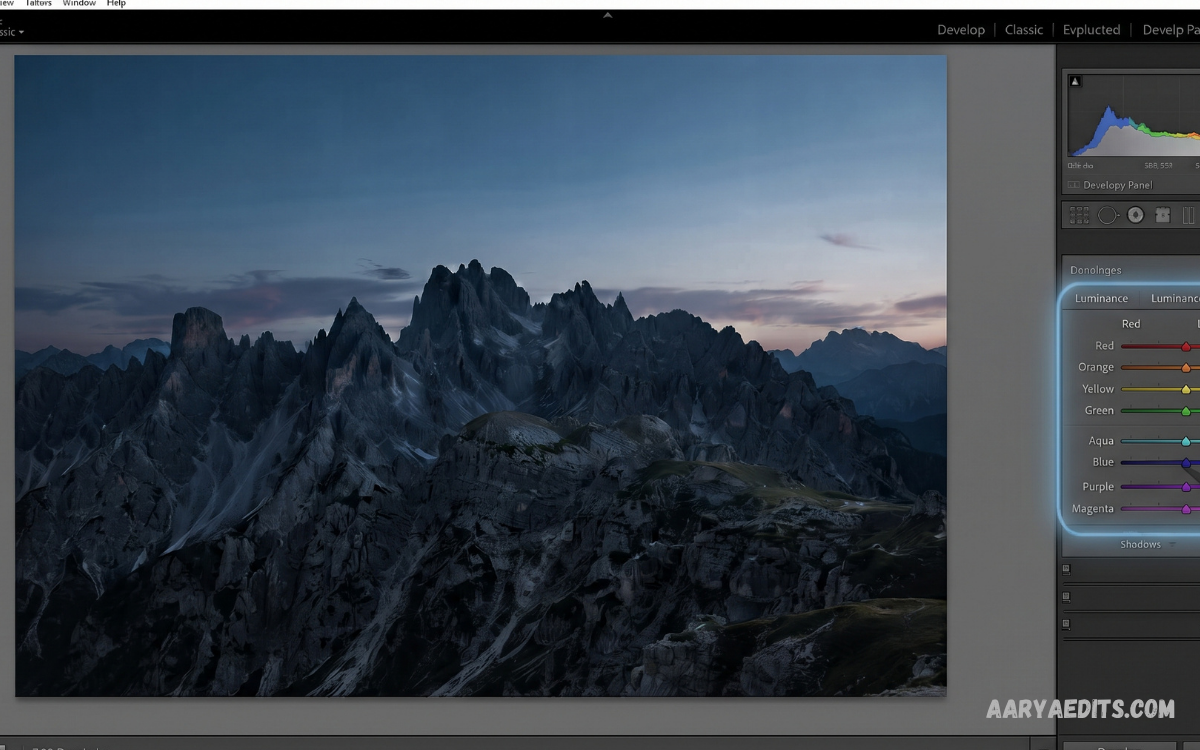
Adobe Lightroom is one of the most powerful tools for photographers, content creators, and mobile editors who want to improve their photos without complicated workflows. The right Lightroom Editing Tips can help you correct exposure, enhance colors, improve details, and create a consistent visual style across your photo collection.
Professional-looking editing does not require extreme adjustments or complicated presets. By understanding Lightroom’s basic tools and applying controlled changes, you can transform ordinary images into polished photographs while preserving natural details and realistic colors.
Start With a Good Original Photo
The quality of the original image has a major impact on the final result. Before applying any adjustments, choose a photo with reasonable exposure, clear details, and useful lighting because Lightroom works best when the source image contains enough information.
Avoid trying to fix every problem through editing. A well-composed and properly exposed photograph usually requires fewer adjustments, producing a cleaner and more professional result.
Adjust Exposure First
Exposure should usually be one of the first settings you evaluate in Lightroom. The Exposure slider controls the overall brightness of the image, allowing you to make an underexposed photo brighter or reduce brightness in an overly bright image.
Make small adjustments instead of moving the slider dramatically. Extreme exposure changes can remove important details from bright areas or make darker areas look noisy and unnatural.
Control Highlights and Shadows
Highlights and Shadows provide more precise control than the main Exposure slider. Lowering Highlights can recover detail in bright skies, windows, or illuminated areas, while increasing Shadows can reveal information in darker portions of an image.
Use these controls carefully to maintain depth and contrast. Excessively raising Shadows can make an image appear flat, while aggressively reducing Highlights can create an unnatural gray appearance.
Improve Contrast Carefully
Contrast separates brighter areas from darker areas and can give a photograph more visual impact. Increasing Contrast slightly can make an image look stronger, while reducing it can create a softer and more subtle appearance.
Professional editing usually depends on balance rather than maximum intensity. Compare the edited image with the original frequently to ensure that the contrast enhancement improves the photograph instead of overwhelming it.
Use White Balance Correctly
White Balance controls the overall color temperature of a photograph. The Temperature and Tint controls can help correct unwanted blue, orange, green, or purple color casts caused by different lighting conditions.
Start by making the image look naturally balanced before creating a creative color style. Accurate white balance provides a strong foundation for additional color adjustments.
Enhance Colors With the Vibrance Tool
Vibrance is useful when you want to strengthen colors without making the entire photograph excessively saturated. It generally provides a more controlled approach to color enhancement than simply increasing Saturation.
Use Vibrance when the photograph looks slightly dull but already contains reasonable color information. Small changes can create a richer appearance while maintaining a natural overall look.
Avoid Excessive Saturation
Saturation affects the intensity of colors throughout the entire image. Increasing it too much can produce unrealistic colors, distracting skin tones, and an artificial appearance.
One of the most useful Lightroom Editing Tips is to prioritize controlled color adjustments. Instead of pushing Saturation aggressively, combine moderate Vibrance with individual color adjustments through the Color Mixer.
Use the Color Mixer for Precision
The Color Mixer allows you to adjust individual colors independently. You can modify Hue, Saturation, and Luminance for colors such as red, orange, yellow, green, aqua, blue, purple, and magenta.
This tool is particularly useful for landscape, travel, product, and creative photography. Adjust individual colors gradually and monitor the entire image after every change to maintain visual consistency.
Create Better Skies
Sky areas often benefit from careful exposure, highlight, and color adjustments. Lightroom’s masking tools can help you make targeted changes to a sky without affecting the foreground.
Reduce excessive brightness, recover highlight detail, and make subtle color adjustments when appropriate. Avoid making skies dramatically darker or more saturated because the result can quickly look artificial.
Use Masks for Local Adjustments
Global adjustments affect the entire photograph, while masks allow you to edit specific areas. Lightroom provides tools for selecting subjects, skies, backgrounds, objects, and other areas for targeted editing.
Masks are valuable for directing attention toward important elements in an image. Apply small adjustments to exposure, contrast, clarity, or color instead of changing the entire photograph unnecessarily.
Improve Detail With Texture and Clarity
Texture and Clarity can enhance the appearance of fine details and midtone contrast. Texture is often useful for emphasizing surface detail, while Clarity can create stronger definition across the image.
These controls should be used with moderation. Excessive Clarity or Texture can make photographs appear harsh and reduce the polished appearance of the final image.
Apply Dehaze Carefully
Dehaze is designed to reduce atmospheric haze and improve definition. It can be particularly useful for certain outdoor photographs where distant elements appear washed out.
Small Dehaze adjustments can increase depth and clarity. Excessive Dehaze may produce heavy contrast and unusual colors, so always compare the result against the original image.
Sharpen Photos Correctly
Sharpening improves the perception of detail and can make an image appear clearer. Lightroom provides controls such as Amount, Radius, Detail, and Masking for more precise sharpening.
Avoid applying strong sharpening to every photograph. Too much sharpening can emphasize unwanted texture, noise, and compression artifacts, especially in images captured in low-light conditions.
Reduce Noise in Low-Light Photos
Noise reduction can improve photographs captured at high ISO settings or in dark environments. Lightroom provides controls for reducing luminance and color noise while attempting to preserve useful details.
Apply noise reduction gradually because excessive processing can make photographs look soft. The goal is to reduce distracting noise while keeping important textures and edges visible.
Crop for Better Composition
Cropping can significantly improve the composition of an image without changing the original camera capture. Use Lightroom’s Crop tool to remove distractions, improve framing, or create a suitable aspect ratio for a particular platform.
Avoid unnecessary cropping that removes important details. Consider the subject, negative space, and intended use of the image before choosing the final crop.
Straighten the Image
A slightly tilted horizon can make an otherwise strong photograph appear unpolished. Lightroom provides simple cropping and straightening controls that can quickly correct tilted buildings, horizons, and other structural elements.
Check horizontal and vertical lines carefully when editing architecture, landscapes, and city photography. A small correction can make the entire image feel more balanced.
Use Presets as a Starting Point
Presets can save time by applying a predefined collection of adjustments. They are useful for developing a consistent editing workflow, especially when processing multiple photographs from the same session.
Avoid applying a preset and leaving every setting unchanged. Treat presets as starting points and customize exposure, white balance, contrast, and colors according to each individual photograph.
Develop a Consistent Editing Style
Consistency is important when publishing photographs as a collection. Similar exposure, color temperature, contrast, and color treatment can make a gallery or portfolio appear more professional.
Consistency does not mean every photograph must look identical. Maintain a recognizable visual direction while adapting individual adjustments to different lighting and subject conditions.
Use the Tone Curve
The Tone Curve provides advanced control over brightness levels. You can adjust shadows, dark tones, highlights, and bright areas to create a specific tonal character.
A subtle S-curve can increase contrast by slightly lowering darker tones and raising brighter tones. Experiment with small changes because aggressive curves can remove detail and create overly dramatic results.
Edit According to Lighting Conditions
Different lighting environments require different editing approaches. Daylight, indoor lighting, golden-hour scenes, cloudy conditions, and nighttime photography can each produce different exposure and color characteristics.
Do not rely on identical settings for every photograph. Analyze the light first, then adjust exposure, white balance, highlights, shadows, and color according to the actual conditions.
Remove Distracting Elements
Lightroom’s healing and removal tools can help clean up small distractions in photographs. They can be useful for removing minor background objects, spots, dust marks, or other elements that draw unnecessary attention.
Use removal tools responsibly and maintain the authenticity of documentary or important real-world photographs. For creative photography, make sure any significant alterations match the intended purpose of the image.
Check Before and After Results
Comparing the edited version with the original is one of the most important Lightroom workflows. The Before and After view helps you identify adjustments that improve the photograph and changes that may have gone too far.
An effective edit should improve the image without making the editing process more noticeable than the photograph itself. If the result looks excessively processed, reduce the strongest adjustments and reassess the image.
Read Also: Lightroom Filters Download: Best Presets for Professional Photo Editing
Edit on a Calibrated Display When Possible
Display differences can affect how colors and brightness appear during editing. A properly calibrated monitor provides a more reliable reference for making accurate adjustments.
If professional calibration equipment is unavailable, keep your display at a reasonable brightness level and avoid editing under extreme screen settings. Reviewing exported images on multiple devices can also help identify major differences.
Export With the Correct Settings
Editing is only part of the workflow because export settings affect the final image. Select an appropriate file format, resolution, quality level, and color space based on where the photograph will be used.
For online publishing, optimized JPEG exports are commonly practical, while photographers may retain higher-quality files for archival purposes. Always keep an original or master version before creating smaller copies for websites and social platforms.
Build a Repeatable Lightroom Workflow
A repeatable workflow saves time and improves consistency. A practical sequence can include organizing photographs, correcting white balance, adjusting exposure, controlling highlights and shadows, refining colors, applying masks, sharpening, reducing noise, cropping, and exporting.
The exact order can change depending on the photograph, but having a standard process reduces unnecessary experimentation. Over time, a consistent workflow can make photo editing faster and more predictable.
Common Lightroom Editing Mistakes
One common mistake is making too many adjustments at once. Large changes to exposure, contrast, saturation, clarity, and sharpness can quickly create an unnatural result that is difficult to correct.
Another mistake is ignoring the original lighting and composition. Editing should enhance the strengths of a photograph rather than attempting to force every image into the same visual style.
Lightroom Editing Tips for Beginners
Beginners should focus on mastering the essential controls before exploring advanced techniques. Exposure, White Balance, Highlights, Shadows, Contrast, Vibrance, Crop, and basic sharpening provide a strong foundation for most everyday editing tasks.
Practice with the same photograph several times using different approaches. Comparing the results teaches you how each tool affects the image and helps you develop better judgment instead of relying entirely on presets.
Lightroom Editing Tips for Professional Results
Professional results usually come from subtle adjustments rather than extreme settings. Focus on accurate exposure, controlled color, balanced contrast, natural detail, and a consistent visual direction.
Use advanced tools such as masks, Color Mixer, Tone Curve, and selective adjustments when they solve a specific problem. Every adjustment should have a clear purpose, making the final image cleaner, more balanced, and visually effective.
Frequently Asked Questions
What are the best Lightroom Editing Tips for beginners?
Start with Exposure, White Balance, Highlights, Shadows, Contrast, and Vibrance before moving to advanced tools. Small adjustments usually produce more natural results than extreme editing.
How can I make my photos look professional in Lightroom?
Focus on balanced exposure, accurate white balance, controlled colors, appropriate contrast, and clean details. Use masks and the Color Mixer when you need precise adjustments instead of changing the entire image.
Should I use Lightroom presets?
Presets can speed up editing and help establish a consistent style. Adjust the preset after applying it because every photograph has different lighting, colors, and exposure.
How much should I increase saturation in Lightroom?
There is no universal saturation value because every image has different color information. Increase Vibrance or Saturation gradually and reduce the setting if colors begin to look unnatural.
What is the difference between Vibrance and Saturation?
Saturation changes the intensity of colors across the entire image. Vibrance provides a more controlled color enhancement and is often useful when you want stronger colors without dramatically increasing every color.
How can I edit skies in Lightroom?
Use Lightroom’s masking tools to select the sky and make targeted adjustments. Exposure, Highlights, Temperature, and color controls can improve the sky while leaving the foreground relatively unchanged.
Is Lightroom good for mobile photo editing?
Lightroom offers powerful editing capabilities on mobile devices, including exposure, color, cropping, presets, and other adjustment tools. It can be useful for photographers who want to edit photographs without using a desktop computer.
How do I avoid over-editing photos?
Make adjustments gradually and frequently compare the edited image with the original. If an effect becomes the first thing you notice instead of the subject, reduce the relevant adjustment.
What is the best order for Lightroom editing?
A useful workflow is to start with cropping and basic exposure, then correct white balance, highlights, shadows, contrast, and color. Finish with local adjustments, detail enhancement, noise reduction, and export preparation.
Can Lightroom improve low-quality photos?
Lightroom can improve exposure, colors, noise, sharpness, and other characteristics of an image. However, editing cannot fully recreate information that was never captured in the original photograph.
How can I make Lightroom editing faster?
Use presets, copy appropriate settings between similar photographs, organize images efficiently, and develop a repeatable workflow. Keyboard shortcuts and batch editing can also reduce repetitive work.
What is the most important Lightroom Editing Tip?
The most important principle is moderation. Aim to enhance the photograph while preserving believable colors, useful detail, balanced contrast, and the original character of the scene.
Conclusion
These Lightroom Editing Tips provide a practical foundation for improving photographs with Adobe Lightroom. From exposure and white balance to color grading, masking, sharpening, cropping, and export settings, each technique can contribute to a more refined editing workflow.
The most important skill is learning to make controlled decisions rather than applying maximum adjustments. With regular practice, careful comparisons, and a consistent workflow, Lightroom can become a powerful tool for creating polished and professional-looking photographs.
