

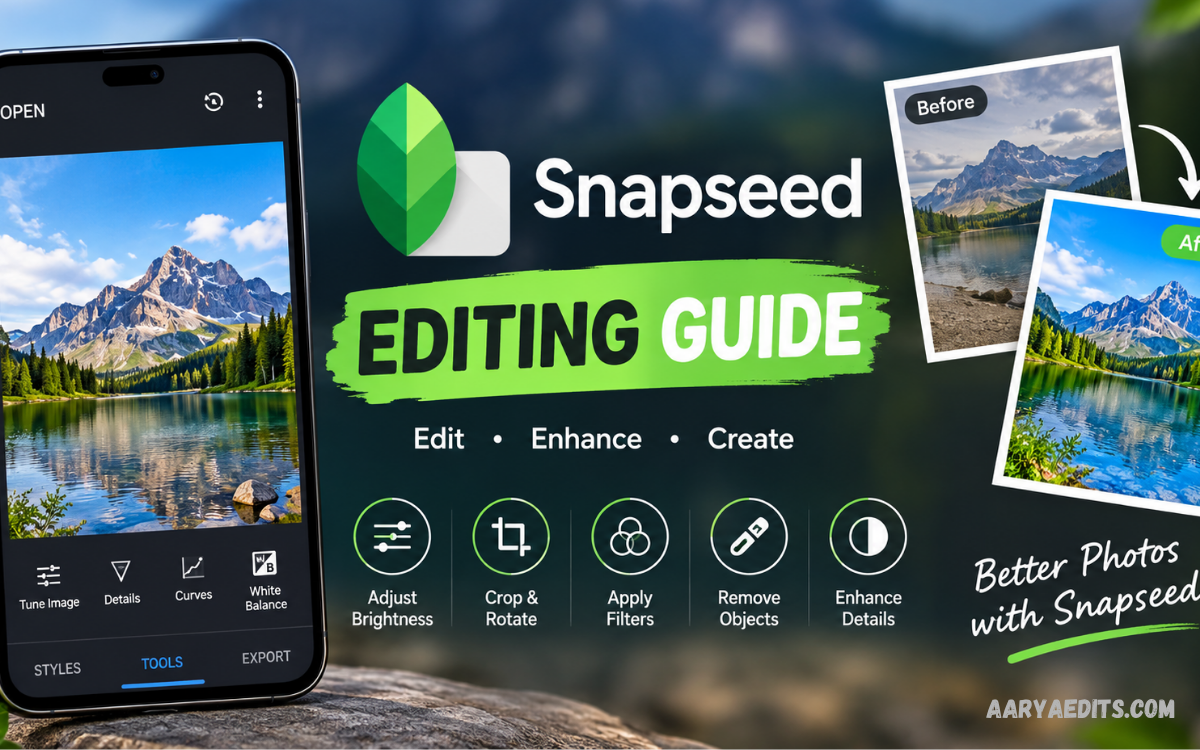
A professional Snapseed editing guide can help beginners and experienced photographers improve mobile photos without complicated desktop software. Snapseed offers a powerful collection of editing tools, filters, adjustments, and creative controls that make detailed photo enhancement possible directly from a smartphone.
This guide explains practical Snapseed editing techniques from basic corrections to advanced selective adjustments. You can learn how to improve exposure, contrast, colors, sharpness, composition, portraits, landscapes, social media photos, and RAW images while maintaining a natural and professional appearance.
What Is Snapseed?
Snapseed is a mobile photo editing application designed for detailed image enhancement and creative editing. Its interface combines simple controls with advanced features, allowing users to adjust photographs through tools such as Tune Image, Details, Curves, White Balance, Selective, Healing, and Perspective.
The application is useful for photographers, content creators, bloggers, social media users, and anyone who wants better-looking images from a smartphone. Instead of applying a single filter to an entire photo, Snapseed allows individual adjustments that provide greater control over the final result.
Why Use a Snapseed Editing Guide?
A structured Snapseed editing guide makes the editing process easier because each tool has a specific purpose. Beginners often increase every available setting, which can produce excessive contrast, unrealistic colors, and unwanted detail. Understanding what each adjustment does helps create balanced results.
A good editing workflow also saves time. Rather than changing settings randomly, you can start with exposure and white balance, improve contrast and details, correct distractions, make selective adjustments, and finish with a suitable crop or creative effect. This approach creates more consistent photographs.
Getting Started With Snapseed
Start by opening Snapseed and importing a photo from your device. After selecting an image, the main editing interface provides access to different tools and filters. You can experiment with adjustments while reviewing the image before saving the finished version.
Before editing, inspect the photograph carefully. Look for exposure problems, color casts, distracting objects, weak composition, excessive shadows, and areas that need attention. Identifying these issues first makes it easier to choose the correct Snapseed tools instead of applying unnecessary effects.
Tune Image for Basic Corrections
Tune Image is one of the most useful starting points for mobile photo editing. It provides controls for brightness, contrast, saturation, ambience, highlights, shadows, and warmth. These settings can correct common problems while establishing the overall appearance of the photograph.
Make small changes rather than pushing sliders to extreme levels. Increase brightness when the image appears too dark, reduce highlights when bright areas lose detail, and adjust shadows when darker sections appear too deep. Subtle changes usually produce a more natural professional result.
How to Adjust Brightness
Brightness controls the overall light level of a photograph. If an image looks underexposed, a moderate brightness increase can reveal important details. However, excessive brightness may remove depth and make bright areas appear flat.
When adjusting brightness, check both bright and dark areas of the image. A balanced photograph should retain useful detail without looking washed out. Zooming into important sections can also help you determine whether the adjustment improves the image or introduces unwanted artifacts.
How to Improve Contrast
Contrast controls the difference between lighter and darker areas. Increasing contrast can give a flat photograph more definition, while reducing contrast can create a softer appearance. The ideal setting depends on the subject, lighting, and intended visual style.
Avoid excessive contrast because it can make shadows too dark and highlights too bright. For portraits, moderate contrast often preserves natural skin detail. For architecture, street photography, and landscapes, slightly stronger contrast can emphasize shapes and textures.
Using Ambience Effectively
Ambience is designed to influence the overall tonal balance of an image. It can reveal information in darker areas while helping create a more visually balanced photograph. This makes it useful when a picture contains uneven lighting.
Use ambience carefully because aggressive adjustments can make an image appear unnatural. After changing the setting, compare the edited image with the original. If details become too prominent or the image loses depth, reduce the adjustment until the photograph looks balanced.
Adjusting Highlights and Shadows
Highlights affect brighter parts of an image, while shadows control darker areas. These controls are especially useful for photographs captured under strong sunlight, where bright skies or reflective surfaces may contain excessive brightness.
Reducing highlights can help restore visual detail in bright regions, while lifting shadows can reveal information hidden in darker areas. Avoid lifting shadows too much because this can create a flat image and introduce visible noise in areas that were originally very dark.
Improving Color With Saturation
Saturation changes the intensity of colors throughout the photograph. A small increase can make dull colors appear more lively, while reducing saturation can create a muted or minimalist appearance.
Professional editing usually avoids extreme saturation. Strong colors may look attractive on a phone screen but can quickly become unrealistic. Adjust saturation while considering skin tones, skies, vegetation, clothing, and other important colors within the composition.
White Balance for Natural Colors
White Balance helps correct unwanted warm or cool color casts. Photographs captured under indoor lighting can sometimes appear yellow or orange, while certain outdoor conditions can produce a cooler appearance.
Use the Warmth adjustment to bring colors closer to their natural appearance. When editing portraits, pay particular attention to skin tones because incorrect warmth can make skin appear unusually orange, yellow, blue, or pale.
Details Tool for Sharpness
The Details tool provides controls for Structure and Sharpening. Sharpening can enhance edges and make important details appear clearer, while Structure can emphasize textures throughout the photograph.
Apply these controls carefully. Excessive sharpening can create harsh edges, while too much structure can make skin and other smooth surfaces look rough. For portraits, use detail adjustments conservatively; for architecture, objects, and landscapes, stronger adjustments may be appropriate.
Curves for Advanced Editing
Curves provide more precise control over brightness and tonal relationships. By adjusting points along the curve, you can independently influence shadows, midtones, and highlights. This makes Curves useful for advanced editing workflows.
Beginners can start with subtle adjustments rather than dramatic curve shapes. A gentle adjustment to darker tones and brighter tones can improve contrast while preserving a natural appearance. With practice, Curves can become one of the most powerful tools in a Snapseed workflow.
Selective Editing in Snapseed
The Selective tool allows you to adjust specific areas instead of changing the entire photograph. You can place a control point over a particular region and modify brightness, contrast, saturation, or structure around that area.
Selective editing is useful when one part of a photograph needs different treatment from the rest. For example, you might brighten a subject, reduce saturation in a distracting background, or enhance detail around an important object without affecting the entire image.
Using Brush for Precise Adjustments
The Brush tool provides localized control over certain image adjustments. It can be useful when you want to change exposure or saturation in specific portions of a photograph rather than applying the adjustment globally.
Work carefully around edges and important subjects. Zooming into the image can improve precision when applying adjustments near hair, clothing, buildings, objects, or other detailed areas. Subtle localized edits can produce a more controlled final image.
Healing Tool for Removing Distractions
The Healing tool can remove small unwanted elements from photographs by blending surrounding areas. It is particularly helpful for eliminating minor distractions such as small marks, spots, or objects that interfere with the composition.
Use Healing conservatively and inspect the edited area afterward. Large objects or complicated backgrounds can be difficult to remove cleanly. Repeated editing over detailed patterns may produce visible inconsistencies, so working on smaller areas can often produce better results.
Perspective Correction
Perspective problems can make buildings, rooms, documents, and other subjects appear distorted. Snapseed’s Perspective tools can help correct certain horizontal and vertical alignment issues.
Perspective correction should preserve the natural appearance of the subject. Excessive correction can stretch or distort objects near the edges of the frame. After making adjustments, inspect the complete photograph rather than focusing only on the corrected area.
Cropping and Straightening
Cropping removes unnecessary areas and improves composition. A strong crop can make the main subject more noticeable while reducing distractions around the edges. Snapseed provides different aspect ratios for various publishing requirements.
Straightening is equally important because a slightly tilted horizon can make an otherwise strong photograph appear unbalanced. Before exporting an image, check horizons, buildings, tables, and other naturally horizontal or vertical elements.
Using Vignette
Vignette can subtly darken or alter the edges of an image while keeping attention toward the central area. It can work particularly well for portraits, food photography, street scenes, and atmospheric photographs.
The effect should remain subtle when aiming for a professional appearance. A heavy vignette can make the image look artificial and may distract from the subject. Adjust the outer brightness and center size carefully until the effect supports the composition.
Portrait Editing With Snapseed
Portrait editing requires a careful balance between correction and natural appearance. Start with exposure, white balance, contrast, and color adjustments before using tools that affect skin detail or facial areas.
Avoid excessive smoothing or sharpening because natural skin texture contributes to realistic portraits. Selective adjustments can help brighten the face or improve contrast in specific areas without changing the entire photograph.
Landscape Photo Editing
Landscape photographs often benefit from careful exposure, contrast, color, and detail adjustments. Start by correcting the overall lighting and white balance, then consider improving the appearance of the sky, foreground, and important landscape features.
Selective editing can be useful when the foreground is darker than the sky. Instead of dramatically increasing overall brightness, make targeted adjustments to specific regions. This approach can preserve the depth and atmosphere of the landscape.
Food Photo Editing
Food photography benefits from accurate colors, controlled brightness, and clear detail. Begin by correcting exposure and white balance so the food appears natural. Moderate saturation can enhance the visual appeal without making ingredients look unrealistic.
Use selective adjustments to draw attention toward the main dish. You can improve brightness or structure around the food while keeping the surrounding area slightly less prominent. Avoid excessive warmth because it can change the natural appearance of ingredients.
Street Photography Editing
Street photography often includes strong contrasts, unusual lighting, architecture, people, and busy backgrounds. Tune Image can establish the overall tonal balance, while Curves can create more controlled contrast.
Black-and-white editing can also work effectively for certain street photographs. Removing color can emphasize expressions, shadows, geometry, and textures. However, the decision should depend on the photograph rather than applying monochrome effects automatically.
Black and White Editing
Snapseed includes tools that can convert photographs into black-and-white images. This style removes color information and places greater emphasis on lighting, shapes, textures, expressions, and composition.
A successful monochrome edit still requires careful tonal control. Adjust brightness and contrast after conversion so important areas remain visible. Strong blacks and bright whites can create impact, but preserving midtone detail is often important for a balanced result.
Double Exposure Creative Editing
Double Exposure combines two images to create a layered visual composition. It can be used for creative portraits, artistic landscapes, silhouettes, and conceptual photography.
Choose source images with compatible shapes, lighting, and subjects. Experiment with different blending modes and opacity levels while checking how the two photographs interact. The strongest results usually have a clear visual relationship between both images rather than random overlapping.
HDR Scape for Dramatic Photos
HDR Scape can produce stronger tonal detail and a more dramatic appearance. It may work well for landscapes, buildings, travel photography, and scenes containing strong textures.
Because HDR effects can become intense quickly, use them with moderation. Excessive processing may introduce an artificial appearance and overpower the original composition. Lowering the strength can help maintain a more controlled visual style.
Vintage and Film-Style Editing
Vintage-style edits can create a nostalgic appearance through muted colors, tonal changes, grain, and other visual effects. Snapseed provides creative filters that can help establish different photographic moods.
The key is consistency. If you want a subtle film-inspired result, combine a restrained filter with manual exposure and color adjustments. Avoid stacking multiple strong effects because the photograph can quickly lose natural detail and visual clarity.
Editing RAW Photos in Snapseed
Snapseed can provide useful controls for compatible RAW photographs, giving photographers more flexibility during the editing process. RAW files generally retain more original image information than compressed formats, which can help during exposure and color correction.
When working with RAW images, begin with fundamental corrections before adding creative effects. Adjust exposure, highlights, shadows, white balance, and contrast first. Once the basic image is balanced, continue with selective and creative editing as needed.
Read Also: Snapseed Editing Tricks: Professional Mobile Photo Editing Guide
Snapseed Editing Workflow
A consistent workflow can make photo editing faster and more reliable. Begin by evaluating composition and image quality, then correct exposure and white balance before adjusting contrast, color, details, and specific areas.
After completing the main corrections, review the image at normal viewing size. Check for excessive saturation, unnatural skin tones, halos, noise, distorted perspective, and distracting edits. Compare the final version with the original before exporting.
Common Snapseed Editing Mistakes
One common mistake is using extreme adjustments because stronger effects are immediately noticeable. Excessive saturation, contrast, sharpening, structure, and HDR effects can make photographs look processed instead of polished.
Another mistake is editing without considering the original lighting. A photograph should maintain a believable relationship between highlights, shadows, and colors. Making smaller changes and reviewing the complete image after every major adjustment can prevent unnecessary over-editing.
How to Create Natural-Looking Edits
Natural editing begins with correction rather than decoration. Fix exposure, white balance, composition, and distracting elements before applying creative effects. The goal should be to improve the photograph while preserving its important visual characteristics.
Use selective tools when only one area requires adjustment. This avoids unnecessary changes to the rest of the image. If you notice the editing effect immediately before noticing the subject, reduce the strength of the adjustment.
Snapseed Editing for Social Media
Social media photographs often need strong clarity and balanced colors because images may be viewed on different screens. Crop the photograph according to the platform’s requirements and make sure the main subject remains clear.
Keep the final edit visually consistent with your other content if you are building a social media profile. Similar color treatment, contrast, and overall mood can create a recognizable visual identity without requiring every photograph to look identical.
How to Save High-Quality Photos
After completing your edits, review the export options available in Snapseed. Choose an appropriate output format and quality level for the intended use, whether you are sharing the image online, storing it, or using it for another project.
Keep an original copy of important photographs before making major edits. This gives you a clean version for future projects and allows you to create different edits without repeatedly processing the same already-edited image.
Advanced Snapseed Editing Tips
Use a combination of global and local adjustments instead of relying on one tool. Global adjustments establish the overall look, while Selective, Brush, and Healing tools allow you to refine specific areas.
Another useful technique is reviewing your image at multiple zoom levels. At high magnification, you can identify unwanted artifacts and edge problems. At normal size, you can judge the overall composition, color balance, and visual impact more accurately.
How Beginners Can Practice Snapseed
The easiest way to learn is through repeated practice with different types of photographs. Edit portraits, landscapes, food photographs, architecture, indoor scenes, and low-light images to understand how different tools respond to different lighting conditions.
Create a simple workflow and repeat it across several images. Compare the original and edited versions after every project. Over time, you will learn which adjustments are useful for specific problems and develop a consistent editing style.
Frequently Asked Questions
Is Snapseed good for beginners?
Yes, Snapseed can be suitable for beginners because its basic tools are relatively easy to understand while advanced options provide room for learning. Start with Tune Image, Crop, White Balance, Details, and Selective before exploring more advanced features.
Can Snapseed create professional photo edits?
Snapseed can produce polished photo edits when its tools are used carefully. Professional results depend on the original photograph, editing decisions, color control, composition, and the user’s understanding of image adjustments.
Which Snapseed tool should I learn first?
Tune Image is a useful starting point because it introduces fundamental controls such as brightness, contrast, saturation, highlights, shadows, and warmth. After learning these controls, move toward Selective, Curves, Healing, and other advanced tools.
How can I make photos look natural in Snapseed?
Use small adjustments and avoid excessive saturation, sharpening, structure, and contrast. Correct the image first, then apply creative effects only when they support the subject and overall composition.
Can Snapseed edit RAW photos?
Snapseed supports editing of compatible RAW photographs and provides controls for making exposure and color adjustments. RAW editing can provide additional flexibility compared with working with a heavily compressed image.
Is Snapseed useful for portrait editing?
Yes, Snapseed can be useful for portrait editing. Exposure, white balance, selective adjustments, details, and healing can help improve portraits while preserving a natural appearance when used carefully.
How do I remove unwanted objects in Snapseed?
The Healing tool can help remove certain small distractions by blending nearby image areas. Results depend on the size and complexity of the object and the surrounding background.
Can Snapseed improve blurry photos?
Snapseed can improve perceived clarity through tools such as Details and Sharpening, but it cannot fully restore information that was never captured. Moderate sharpening usually produces better results than extreme settings.
How can I improve landscape photos in Snapseed?
Begin with exposure and white balance, then adjust contrast, highlights, shadows, saturation, and details. Selective adjustments can help refine the sky or foreground without applying the same changes to the entire photograph.
What is the best Snapseed editing workflow?
A practical workflow is to start with cropping and composition, correct exposure and white balance, adjust contrast and color, refine details, remove distractions, apply selective adjustments, and finish with a subtle creative effect if needed.
Conclusion
Before saving an edited photograph, check exposure, white balance, contrast, saturation, highlights, shadows, sharpness, composition, and distracting elements. Make sure the subject remains clear, and the image still looks natural after all adjustments.
A strong Snapseed editing guide is not about using every tool available. It is about understanding when each tool is useful and applying adjustments with control. With a consistent workflow and regular practice, Snapseed can become a capable mobile solution for creating polished photographs.
