

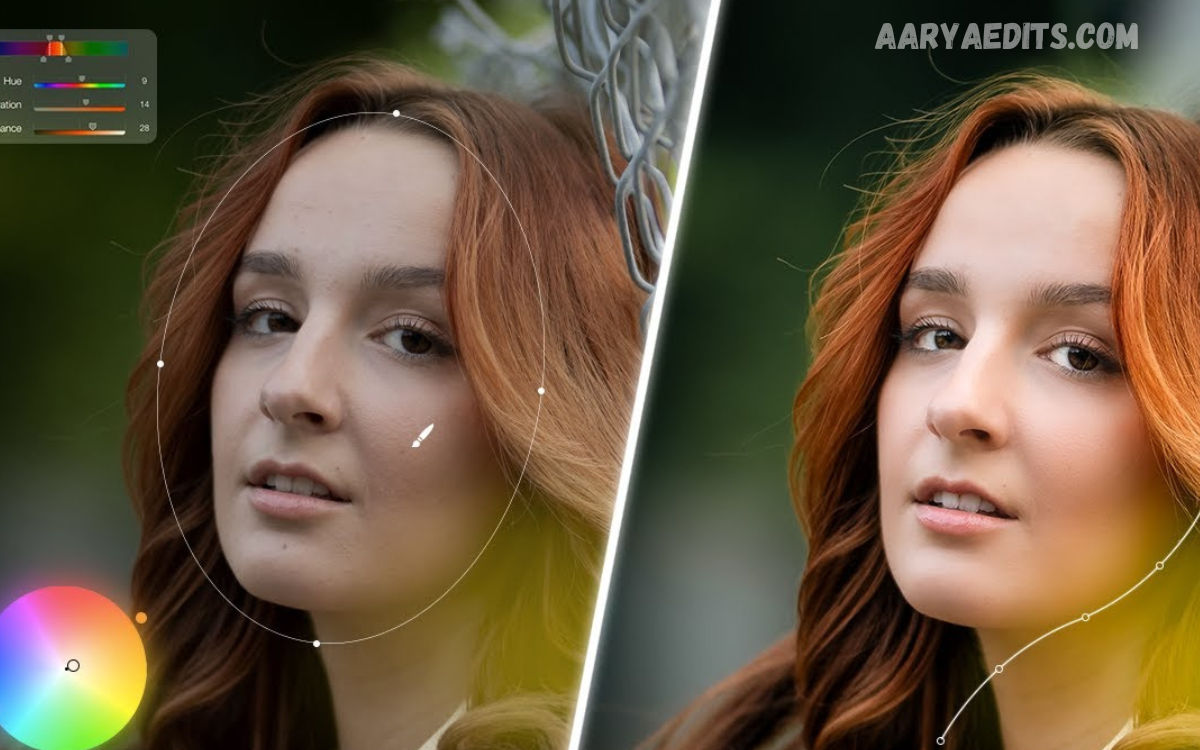
Photography has evolved beyond simply capturing moments. Today, cinematic photo editing transforms ordinary images into visually powerful masterpieces that evoke emotion, tell stories, and create a professional appearance.
This Professional Cinematic Photo Editing Tutorial will guide you through every essential step, from selecting the right image to advanced color grading and final export settings. By following these professional techniques, you’ll be able to create movie-inspired photographs.
What Is Professional Cinematic Photo Editing?
Professional cinematic photo editing is the process of enhancing photographs to resemble scenes from high-quality films. It combines advanced color grading, lighting adjustments, contrast control, and storytelling techniques to produce visually appealing images.
Unlike basic photo editing, cinematic editing focuses on mood and atmosphere. Every adjustment—from shadows to highlights is carefully balanced to create emotional impact while maintaining a natural and realistic appearance.
Choose the Right Photo Before Editing
Every cinematic edit starts with selecting the best image. High-resolution RAW files provide more editing flexibility because they retain greater detail in highlights, shadows, and colors.
Images with strong lighting, balanced composition, and a clear subject produce better cinematic results. Photos taken during sunrise, sunset, or overcast conditions naturally complement cinematic color grading.
Use Professional Editing Software
Professional editors rely on software that provides complete control over colors, lighting, and advanced adjustments. Adobe Lightroom, Adobe Photoshop, Capture One, and Luminar Neo are among the most popular editing tools.
These programs include features like masking, selective adjustments, color grading wheels, AI enhancement tools, and advanced sharpening options. Learning these tools significantly improves editing efficiency and final image quality.
Start With Basic Image Corrections
Before applying cinematic effects, begin by correcting exposure, white balance, contrast, and lens distortion. Proper basic adjustments create a clean foundation for advanced editing.
Avoid making aggressive edits during this stage. Balanced exposure and accurate colors ensure that cinematic effects appear natural rather than exaggerated.
Adjust White Balance Professionally
White balance controls the overall temperature of an image. Warmer tones create emotional, nostalgic scenes, while cooler tones produce dramatic and mysterious atmospheres.
Professional editors often fine-tune temperature and tint manually instead of relying on automatic adjustments. This approach delivers more consistent cinematic color grading.
Perfect Exposure and Contrast
Exposure determines overall brightness, while contrast defines separation between light and dark areas. Balanced exposure preserves important image details without overexposing highlights.
Increasing contrast slightly adds depth and drama. However, excessive contrast may reduce detail, so professional editors make gradual improvements.
Recover Highlights and Shadows
Highlight recovery restores details in bright areas such as skies and reflections. Shadow adjustments reveal hidden information without introducing excessive noise.
Maintaining detail in both highlights and shadows creates a cinematic dynamic range similar to professional movie scenes.
Read Also: Advanced AI Image Generation and Editing
Improve Image Composition
Cropping improves composition by eliminating distractions and strengthening the subject’s placement. Popular cinematic aspect ratios include 16:9 and 2.39:1.
Following the rule of thirds, leading lines, and balanced framing helps create visually engaging photographs that naturally attract attention.
Apply Professional Color Grading
Color grading is the most important step in cinematic editing. It changes the mood, emotion, and storytelling quality of a photograph.
Professional editors often combine warm orange highlights with cool teal shadows. This classic cinematic color combination creates depth while maintaining realistic skin tones.
Enhance Skin Tones Naturally
Portrait editing requires careful attention to skin tones. Over-editing often creates artificial-looking results that reduce image quality.
Professional photographers use selective color adjustments to preserve natural skin texture while correcting unwanted color casts and uneven tones.
Create Dramatic Lighting
Lighting defines the cinematic mood. Local adjustments allow editors to brighten important areas while darkening distracting backgrounds.
Dodging and burning techniques improve depth, shape, and realism by emphasizing facial features, clothing textures, and environmental details.
Use Curves for Advanced Adjustments
Tone curves provide precise control over brightness and contrast. Small curve adjustments can dramatically improve cinematic appearance.
Professional editors often create soft matte blacks by slightly lifting shadow points while maintaining rich highlights for a film-inspired look.
Add Selective Color Adjustments
Instead of changing every color equally, professionals edit individual color channels. Blues, oranges, greens, and yellows receive customized adjustments.
Selective color grading creates cleaner visuals while maintaining realistic color relationships throughout the image.
Reduce Digital Noise
Noise becomes visible in low-light photography and high ISO images. Professional noise reduction preserves image quality without removing important textures.
Modern editing software includes intelligent AI noise reduction that maintains sharpness while eliminating unwanted grain.
Sharpen Important Details
Sharpening enhances facial features, clothing textures, eyes, landscapes, and architectural details. Professional sharpening focuses on important subjects rather than the entire image.
Selective sharpening produces crisp images without creating halos or unnatural artifacts.
Apply Cinematic Vignettes
A subtle vignette naturally draws attention toward the main subject by slightly darkening the edges of the photograph.
Professional editors use soft vignettes that blend naturally instead of obvious dark borders that distract viewers.
Add Depth Using Blur
Background blur separates subjects from distracting environments. Lens blur effects mimic professional camera lenses with shallow depth of field.
Realistic blur strengthens storytelling while creating a premium, cinematic appearance similar to feature films.
Maintain Natural Colors
Many beginners oversaturate images, making them appear unrealistic. Professional cinematic editing emphasizes subtle color adjustments instead.
Balanced saturation creates elegant photographs that remain timeless across different viewing platforms and devices.
Export Images Correctly
Export settings determine final image quality. High-resolution JPEG or TIFF formats are suitable for professional portfolios, websites, and printing.
Selecting the correct color space, compression level, and sharpening settings ensures consistent image quality across multiple platforms.
Common Mistakes to Avoid
Many beginners apply excessive filters, oversharpen images, and push color grading beyond realistic levels. These mistakes reduce overall professionalism.
Professional editors focus on subtle improvements that enhance storytelling while preserving natural textures, colors, and lighting throughout the photograph.
Tips for Faster Professional Editing
Creating presets speeds up editing while maintaining consistency across multiple projects. Presets can be customized for portraits, landscapes, travel photography, and commercial work.
Organizing files, calibrating monitors, and practicing non-destructive editing improve efficiency while protecting original image quality throughout the editing process.
Frequently Asked Questions
What is cinematic photo editing?
Cinematic photo editing transforms images into movie-style visuals using advanced lighting, color grading, contrast, and storytelling techniques.
Which software is best for cinematic editing?
Adobe Lightroom, Photoshop, Capture One, and Luminar Neo are among the best professional editing applications.
Should I edit RAW photos?
Yes. RAW files contain more image information, allowing better recovery of highlights, shadows, and colors.
What colors create a cinematic look?
Teal shadows combined with warm orange highlights are the most popular cinematic color combination.
Is cinematic editing suitable for portraits?
Yes. Portrait photography benefits greatly from cinematic lighting, color grading, and selective sharpening.
How can I improve lighting during editing?
Use local adjustments, dodging, burning, curves, and radial masks to enhance lighting naturally.
What is the ideal aspect ratio?
Many professionals use 16:9 or 2.39:1 for a cinematic presentation.
How do professionals avoid over-editing?
They make subtle adjustments while preserving natural textures, colors, and realistic lighting.
Can beginners learn cinematic editing?
Absolutely. Consistent practice and a solid understanding of basic editing principles help beginners achieve professional-quality results.
How long does professional cinematic editing take?
Simple edits may take 10–20 minutes, while detailed commercial projects can require an hour or more.
Conclusion
Mastering this Professional Cinematic Photo Editing Tutorial requires patience, creativity, and consistent practice. Every successful cinematic image begins with proper exposure, balanced composition, and thoughtful color grading rather than excessive effects.
By following professional editing techniques, keeping adjustments realistic, and developing a consistent workflow, you can create visually stunning photographs that capture emotion, tell compelling stories, and stand out across digital platforms.
