

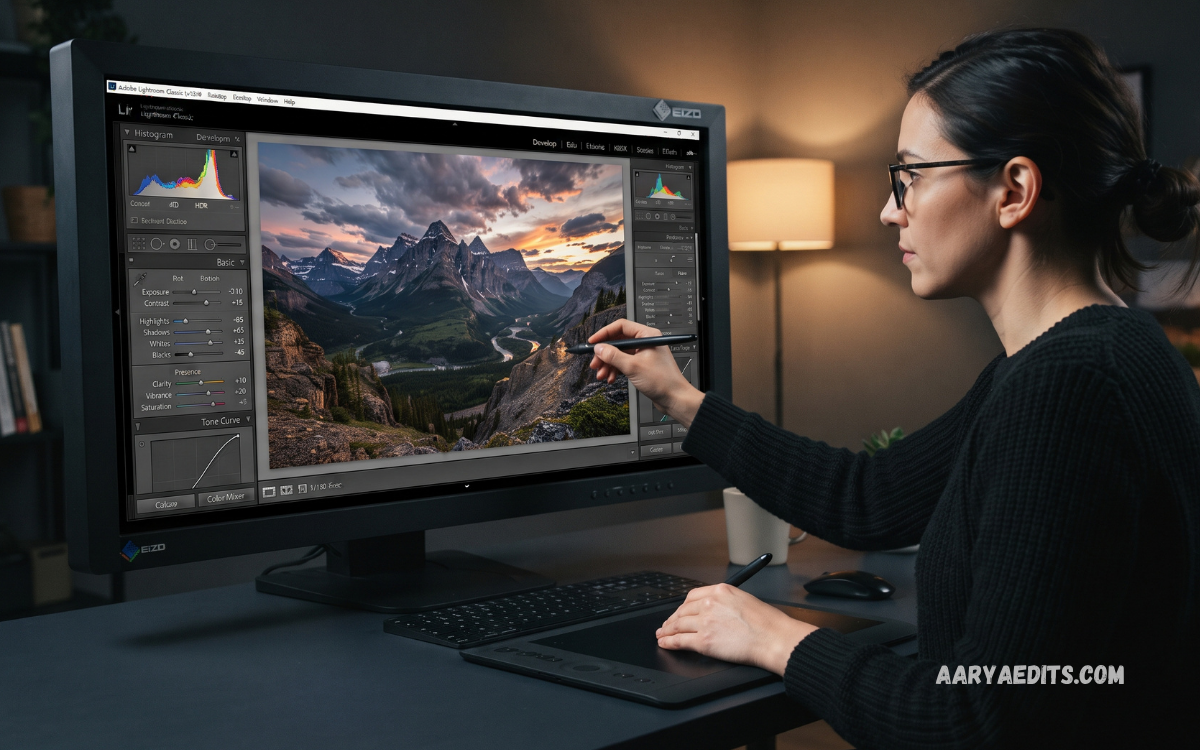
Lightroom HDR Editing is a powerful technique for improving photographs with challenging lighting, high contrast, and a wide range of bright and dark tones. Adobe Lightroom provides advanced HDR tools that help photographers recover details, enhance dynamic range, and create natural-looking images without making photos appear overly processed.
HDR editing allows you to bring out details that may be hidden in shadows while controlling extremely bright highlights. With the right adjustments, Lightroom can transform ordinary photographs into balanced, detailed, and visually appealing images.
What Is Lightroom HDR Editing?
Lightroom HDR Editing refers to the process of enhancing high-dynamic-range photographs using Adobe Lightroom’s editing tools. HDR stands for High Dynamic Range, a technique designed to preserve and display details across both bright highlights and dark shadows.
Traditional photographs can struggle when a scene contains extreme differences between light and dark areas. Lightroom HDR tools help manage these differences by providing greater control over exposure, highlights, shadows, white balance, contrast, and color.
Why Lightroom HDR Editing Matters
Modern cameras can capture a large amount of information, but difficult lighting conditions can still create problems with exposure. HDR editing gives photographers more flexibility to recover important details and create a balanced final image.
Lightroom is particularly useful because it combines HDR processing with professional color and tonal controls. Instead of relying entirely on automatic processing, photographers can fine-tune every major part of an image according to their creative goals.
How HDR Works in Lightroom
HDR photography often involves combining multiple exposures of the same scene into one image. Each exposure captures different levels of brightness, allowing Lightroom to create a final photograph with a broader tonal range.
For example, one exposure may preserve details in the sky while another captures information in darker foreground areas. Lightroom can merge compatible exposures into an HDR image while maintaining important details and providing additional editing flexibility.
Preparing Photos for HDR Editing
Before starting Lightroom HDR Editing, select photographs captured from the same position whenever possible. Consistent framing makes the merging process easier and helps produce cleaner results.
Images should ideally have similar white balance and focus settings, although Lightroom can compensate for certain differences. Avoid unnecessary movement between exposures because moving subjects can create unwanted artifacts during the HDR merge.
Importing HDR Photos Into Lightroom
Start by importing your photographs into Lightroom and organize the exposures you want to combine. Keeping related images together makes it easier to identify the correct exposure sequence.
Review each photograph before beginning the merge process. Select images that contain useful highlight and shadow information rather than automatically choosing every photograph from the same scene.
Creating an HDR Image
Select the desired exposures and use Lightroom’s HDR merge functionality to combine them into a single image. Lightroom analyzes the selected frames and creates an HDR result that contains a wider range of tonal information.
The merge process may include options such as Auto Align and Auto Settings. Auto Align is useful when photographs have slight camera movement, while Auto Settings can provide a starting point for further manual editing.
Understanding Exposure in HDR Editing
Exposure is one of the most important controls in Lightroom HDR Editing. It determines the overall brightness of the photograph and should be adjusted carefully after the HDR merge.
Avoid increasing exposure simply to make an image brighter. A well-balanced HDR photograph should maintain highlight detail, shadow information, and realistic midtones.
Controlling Highlights
Highlights control the brightest areas of an image and are particularly important when editing landscapes, architecture, and outdoor photographs. Reducing highlights can recover detail in bright skies, reflective surfaces, and illuminated areas.
However, excessive highlight reduction can make photographs look flat. Use moderate adjustments and combine them with exposure, whites, and contrast controls to maintain depth.
Improving Shadow Details
Shadows contain valuable information that may become difficult to see in high-contrast scenes. Increasing the Shadows slider can reveal details in dark foregrounds, buildings, interiors, and other underexposed areas.
Avoid lifting shadows too aggressively because excessive shadow recovery can introduce a washed-out appearance. The goal is to reveal useful details while preserving natural depth and contrast.
Using Whites and Blacks
The Whites and Blacks sliders help establish the brightest and darkest points of the photograph. Adjusting these controls can give an HDR image stronger contrast and a more polished appearance.
Reduce whites when important bright areas appear too intense, and lower blacks when the image needs deeper shadows. Small adjustments are usually more effective than extreme changes.
Adjusting Contrast
Contrast controls the difference between light and dark tones in your photograph. HDR images can sometimes appear flat after shadow recovery, making contrast adjustments useful for restoring visual depth.
Increase contrast gradually and monitor the entire image. Too much contrast can remove shadow information and create harsh highlights, defeating the purpose of HDR editing.
Using Texture and Clarity
Texture and Clarity can enhance local detail and improve the visual definition of HDR photographs. Texture is useful for surfaces such as rocks, buildings, clothing, and natural elements.
Clarity creates a stronger separation between midtones and can make an image appear more dramatic. Use both controls carefully because excessive adjustments may produce unnatural edges and an overprocessed appearance.
Dehaze for HDR Photos
Dehaze is useful when atmospheric conditions reduce contrast and visibility. It can strengthen distant details and improve the appearance of landscapes, mountains, and outdoor scenes.
A small amount of Dehaze can create a cleaner photograph, but excessive use can make colors too intense and shadows unnecessarily dark. Combine Dehaze with exposure and contrast adjustments for a balanced result.
Color Adjustments in Lightroom HDR Editing
Color plays an important role in professional HDR photography. After balancing exposure and dynamic range, use Lightroom’s color controls to create accurate and visually pleasing tones.
Adjust Temperature and Tint to correct white balance before making creative color changes. Correct white balance helps maintain realistic colors and provides a better foundation for additional editing.
Saturation and Vibrance
Vibrance and Saturation control the intensity of colors in an image. Vibrance generally provides a more controlled enhancement, making it useful for HDR photographs that already contain strong colors.
Avoid excessive saturation because HDR images can quickly become unrealistic. Professional editing usually favors controlled colors that complement the scene rather than overpowering it.
Using the Tone Curve
The Tone Curve provides advanced control over brightness and contrast across different tonal ranges. It can be used to create subtle adjustments that are difficult to achieve with basic sliders.
A gentle S-curve can add contrast while maintaining a natural appearance. Experiment with small curve adjustments rather than creating extreme tonal changes.
HDR Editing for Landscape Photography
Landscape photography is one of the most popular applications of Lightroom HDR Editing. Scenes containing bright skies, dark foregrounds, and strong sunlight often benefit from expanded dynamic range.
HDR processing can recover cloud details while revealing information in trees, rocks, buildings, and other foreground elements. The final result should retain the natural atmosphere of the scene rather than looking artificially bright.
HDR Editing for Architecture
Architecture photographs often contain strong differences between indoor and outdoor lighting. HDR editing can balance windows, walls, ceilings, shadows, and exterior areas within the same photograph.
Use perspective and lens correction tools alongside HDR adjustments when necessary. Correcting distortion and perspective can make architectural images appear cleaner and more professional.
HDR Editing for Interior Photography
Interior photography frequently requires HDR techniques because rooms can contain dark areas alongside bright windows. Combining multiple exposures can provide a balanced image with visible interior and exterior details.
After merging exposures, adjust highlights and shadows before working on color. Maintaining realistic brightness is important because excessive HDR processing can make interiors appear unnatural.
Common Lightroom HDR Editing Mistakes
One of the biggest mistakes is using excessive HDR adjustments. Extremely bright shadows, heavily reduced highlights, strong clarity, and excessive saturation can create an artificial appearance.
Another common mistake is ignoring the original lighting conditions. HDR editing should enhance the information captured by the camera rather than completely changing the visual character of the photograph.
How to Make HDR Photos Look Natural
Start with basic exposure corrections before applying dramatic effects. Balance highlights, shadows, whites, and blacks first, then refine contrast and color.
Compare the edited photograph with the original during the process. If the final image looks significantly more artificial than the original scene, reduce the intensity of your adjustments.
Lightroom HDR Editing Workflow
A reliable workflow begins with selecting suitable exposures and creating the HDR merge. After merging, correct white balance, exposure, highlights, shadows, whites, and blacks.
Next, refine contrast, texture, clarity, dehaze, color, and the tone curve. Finish with lens corrections, sharpening, noise reduction, cropping, and other adjustments required for the final image.
Read Also: Lightroom RAW Photo Editing: Complete Guide for Better Photos
Noise Reduction in HDR Photos
HDR processing can reveal noise, especially when shadow areas are significantly brightened. Lightroom’s noise reduction tools can help improve image quality without removing important details.
Apply noise reduction carefully because excessive processing can make photographs look soft. Balance noise reduction with sharpening to maintain a detailed and natural result.
Sharpening HDR Images
Sharpening improves the perceived detail and definition of a photograph. Lightroom provides controls for Amount, Radius, Detail, and Masking that allow photographers to customize sharpening.
Use Masking when you want to apply sharpening primarily to important edges. This approach can help prevent excessive sharpening in smooth areas such as skies and walls.
Exporting HDR Images
After completing Lightroom HDR Editing, choose export settings based on how the photograph will be used. Web images generally require optimized dimensions and file sizes, while high-quality prints benefit from larger files and appropriate resolution.
Choose a suitable color space and file format for your destination. Always review the exported image because colors and brightness can appear slightly different across devices and platforms.
Tips for Better Lightroom HDR Editing
Use a consistent workflow instead of making random adjustments. Begin with exposure and dynamic range, then move toward contrast, color, detail, and final corrections.
Keep adjustments subtle and regularly compare your work with the original photograph. Professional HDR editing is usually about preserving detail and improving balance rather than creating an exaggerated effect.
Lightroom HDR Editing vs Traditional Editing
Traditional editing can improve exposure, contrast, and color within a single photograph. HDR editing provides additional flexibility when one exposure cannot adequately capture both bright and dark areas.
HDR is particularly valuable for high-contrast scenes where important information exists throughout the tonal range. However, traditional editing may be preferable when the original photograph already contains sufficient dynamic range.
Benefits of Lightroom HDR Editing
Lightroom HDR Editing provides greater control over difficult lighting conditions and helps recover details across a wider tonal range. It also integrates HDR processing with professional color, detail, lens, and tonal adjustment tools.
Another benefit is creative flexibility. Photographers can create natural-looking results for professional work or apply stronger adjustments for artistic photography, depending on the desired style.
Frequently Asked Questions
What is Lightroom HDR Editing?
Lightroom HDR Editing is the process of combining and enhancing photographs with different exposure levels to create a final image with improved highlight and shadow detail.
Is Lightroom good for HDR editing?
Yes, Lightroom offers HDR merging and a wide range of tonal, color, and detail controls that make it suitable for professional HDR photography workflows.
How many photos are needed for HDR?
HDR can be created from multiple exposures of the same scene, with the exact number depending on the lighting conditions and the amount of dynamic range required.
Can Lightroom HDR editing look natural?
Yes, natural HDR results are possible when exposure, highlights, shadows, contrast, and color are adjusted carefully instead of using extreme settings.
What is the best Lightroom HDR workflow?
A strong workflow starts with exposure merging, followed by white balance, exposure, highlights, shadows, whites, blacks, contrast, color, detail, and final export adjustments.
Does HDR improve photo quality?
HDR can improve the tonal balance of photographs by preserving more information in bright and dark areas. The quality of the final result also depends on the original exposures and editing technique.
Should HDR photos have high saturation?
Not necessarily. Professional HDR photographs often look better with controlled saturation and natural colors rather than highly intense color adjustments.
Can Lightroom edit HDR without multiple exposures?
Yes, Lightroom can enhance a single photograph using HDR-style tonal adjustments, although true HDR merging generally benefits from multiple exposures captured at different brightness levels.
Is Lightroom HDR useful for landscapes?
Yes, landscape scenes with bright skies and darker foregrounds are excellent candidates for HDR processing because the technique can help balance different exposure levels.
How can I avoid an overprocessed HDR look?
Keep clarity, dehaze, saturation, contrast, and shadow recovery under control. Regularly compare the edited image with the original to ensure the final result remains realistic.
Conclusion
Lightroom HDR Editing is an effective way to improve photographs containing challenging lighting and extreme contrast. By combining multiple exposures and carefully controlling highlights, shadows, contrast, color, and detail, photographers can produce images with greater depth and balanced tonal information.
The key to professional HDR results is moderation and consistency. Instead of pushing every adjustment to its maximum level, focus on preserving natural lighting, recovering useful details, and creating a final photograph that looks polished without appearing overly processed.
