

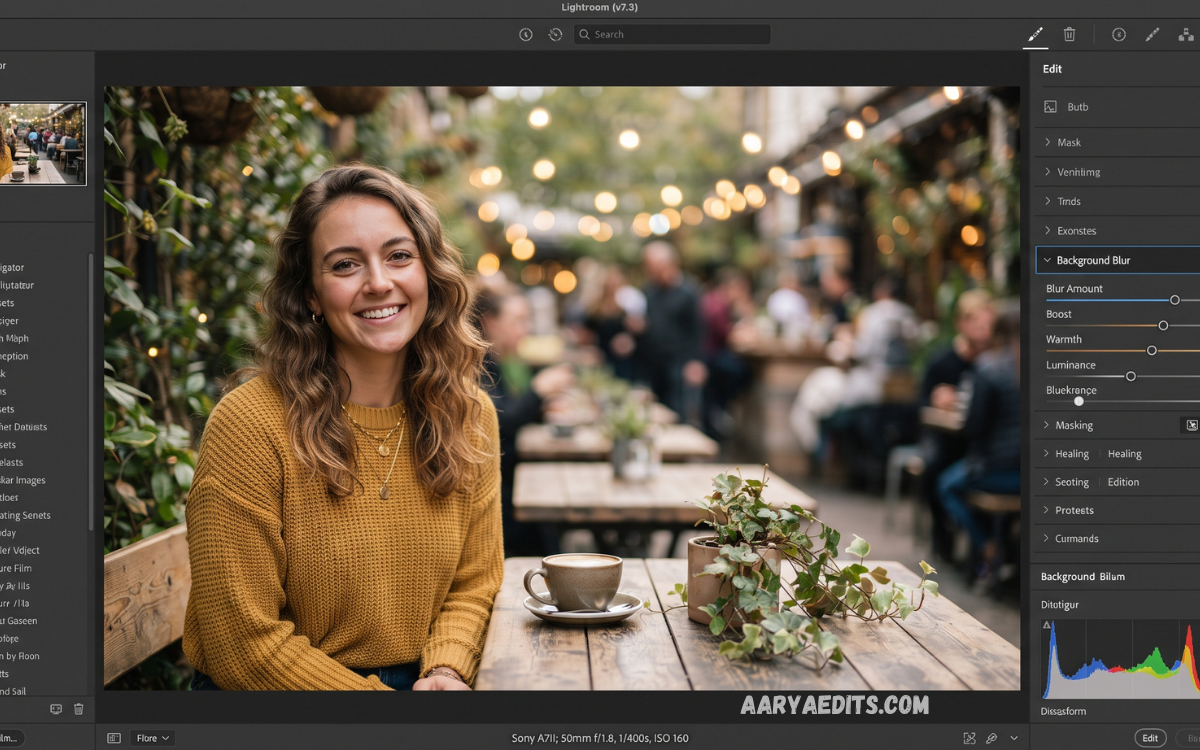
Lightroom Background Blur has become a popular editing technique for photographers who want professional-looking portraits without complicated software. A carefully blurred background directs attention toward the main subject, creates visual separation, and gives photographs a polished appearance.
Creating background blur in Lightroom requires more than simply reducing clarity across an entire image. Professional editing depends on selective adjustments that keep the subject sharp while gradually softening surrounding areas. Natural transitions are especially important because aggressive masking can produce artificial edges around hair, clothing, or objects.
What Is Lightroom Background Blur?
Lightroom Background Blur refers to the process of selectively softening background areas while keeping the primary subject relatively sharp. The technique simulates shallow depth of field commonly produced by wide-aperture lenses.
The quality of Lightroom Background Blur depends on subject selection, masking accuracy, blur intensity, edge refinement, and tonal consistency. A convincing result typically features a gradual transition between sharp and soft areas rather than an obvious boundary.
Why Use Lightroom Background Blur?
Background blur improves visual hierarchy by making the primary subject stand out. Portrait photographers frequently use this technique when an original photograph contains distracting buildings, trees, vehicles, furniture, people, or other environmental elements. Softening those distractions allows viewers to concentrate naturally on the face or main subject. Product photographers can also use selective blur to make a product appear more prominent within a busy scene.
Another advantage involves photographs captured with limited depth of field. Some cameras or smartphones produce relatively deep focus because of small sensors or automatic camera settings. Lightroom can provide additional separation during post-processing. Although software cannot perfectly reproduce every optical characteristic of a physical lens, careful masking and Lens Blur adjustments can create a convincing approximation. The technique also provides flexibility because the blur strength can be modified repeatedly without changing the original photograph.
Lightroom Lens Blur for Background Separation
Lightroom Lens Blur is one of the most useful features for creating realistic background softness. It uses computational depth information and user-defined focus controls to simulate optical depth of field. Depending on the image, Lightroom can automatically estimate depth or allow the editor to refine the depth map manually. This makes the effect considerably more sophisticated than simply lowering Texture or Clarity.
When using Lens Blur, start with a conservative blur amount rather than immediately selecting maximum intensity. Excessive blur can make the background appear artificial, particularly when recognizable objects lose their natural structure too quickly. Adjust the Focus Range so the primary subject remains inside the sharp zone, then gradually increase Blur Amount. The goal should be believable separation rather than maximum softness. Bokeh characteristics can also be adjusted when available, helping produce a more photographic appearance.
How to Blur a Background in Lightroom
Begin by opening the photograph in Lightroom and entering the Develop workspace. Select the Masking tool and choose the Subject option if the image contains a clearly identifiable main subject. Lightroom will analyze the photograph and generate a subject mask. Inspect the mask carefully before making adjustments because automatic selections can occasionally include background areas or exclude fine details.
After creating the subject mask, consider creating an inverted version so adjustments affect the background rather than the subject. Use subtract and add controls to correct imperfect areas. For portraits, pay particular attention to hair, fingers, clothing edges, glasses, and small gaps between the body and surrounding objects. Once the background mask is accurate, apply Lens Blur or carefully reduce Texture, Clarity, and Sharpness. Keep the effect moderate and inspect the image at different zoom levels before finalizing the edit.
Step-by-Step Lightroom Background Blur Workflow
A professional workflow begins with image analysis. Before applying any adjustment, identify the primary subject, background distractions, lighting direction, and natural depth relationships. Ask which parts of the image should remain sharp and which elements should become progressively softer. This planning stage prevents excessive blur and helps maintain a realistic visual hierarchy.
Next, create a subject mask and refine its boundaries. Duplicate or invert the mask when necessary to isolate the background. Apply Lens Blur to introduce optical softness, then use Texture, Clarity, and Sharpness adjustments for additional control. Reduce saturation slightly in distracting background elements when appropriate, but avoid creating a background that looks disconnected from the original environment. Finally, zoom out and examine the complete photograph. A professional Lightroom Background Blur effect should support the photograph rather than become the most noticeable feature.
Using Select Subject for Background Blur
Select Subject provides one of the fastest methods for isolating the main object. Lightroom’s AI-powered masking analyzes image content and attempts to identify the dominant subject automatically. This feature is particularly effective for portraits, people, animals, products, and clearly defined objects. It can significantly reduce manual masking time.
Automatic selection should still be inspected carefully. Fine hair, translucent fabrics, branches, jewelry, and irregular object boundaries can challenge automated detection. Use Add and Subtract masking tools to improve the selection where necessary. Once the subject mask looks accurate, invert it to target the background. This approach provides a strong foundation for Lightroom Background Blur without requiring extensive manual brushing.
Using Brush Masking for Precise Blur
Brush masking provides greater control when automatic subject selection does not produce satisfactory results. Select the Brush tool and paint over background regions that require softening. Adjust brush Size, Feather, Flow, and Density according to the complexity of the scene. A soft feather generally works well around curved or irregular areas because it creates smoother transitions.
Manual brushing becomes especially useful for environmental portraits and complex compositions. Background areas between hair strands, around arms, near objects, or behind small gaps may require individual attention. Instead of applying one aggressive mask, create several controlled masks for different depth zones. This allows nearby objects to retain more detail while distant elements receive stronger blur.
Creating Natural Depth With Multiple Masks
Professional background blur rarely uses identical blur strength across the entire background. Real optical depth of field produces varying levels of sharpness depending on the distance from the focal plane. Lightroom editors can imitate this behavior by creating multiple masks and applying different adjustments to each depth zone.
For example, a nearby background object might receive a moderate reduction in Texture and Clarity, while a distant wall or foliage area receives stronger Lens Blur. This layered approach creates depth instead of producing a flat, uniformly blurred background. Multiple masks also make it easier to preserve important environmental context.
Read Also: Professional Background Blur Editing Techniques
Lightroom Background Blur for Portrait Photography
Portrait photography is one of the most common applications for Lightroom Background Blur. A blurred background emphasizes facial features, eyes, expressions, clothing, and posture while minimizing environmental distractions. The technique works particularly well for outdoor portraits where trees, buildings, traffic, and other objects compete with the subject.
When editing portraits, avoid blurring hair and clothing edges excessively. Human subjects contain many fine details that reveal artificial masking immediately. Keep the face and eyes sharp, preserve natural hair strands, and use gradual transitions around shoulders and arms. If the original image contains strong foreground objects, consider creating separate masks instead of applying identical blur to every non-subject area.
Lightroom Background Blur for Product Photography
Product photographers can use selective background blur to increase visual emphasis without removing the original environment. A sharp product against a softly blurred background can create a premium commercial appearance. This approach works well for watches, electronics, cosmetics, accessories, food, furniture, and other products.
Product edges require particular attention because clean geometric shapes can reveal masking errors quickly. Inspect corners, reflective surfaces, transparent packaging, and small details carefully. Use a relatively subtle blur when the background provides useful contextual information. Stronger blur may work for simple promotional compositions, while moderate softness often looks more natural for lifestyle product photography.
Lightroom Background Blur for Mobile Photos
Modern smartphones produce increasingly detailed photographs, but many images still contain backgrounds that compete with the main subject. Lightroom provides useful tools for improving these photographs without requiring a desktop-only workflow. Subject masking and selective adjustments can create stronger separation in portraits, travel photographs, food images, and everyday snapshots.
Mobile editing benefits from a restrained approach because small screens can make excessive blur appear attractive initially. Inspect the photograph at full size before exporting. Check edges, facial details, hair, and objects surrounding the subject. A moderate Lightroom Background Blur effect usually produces a more believable result than an extreme blur that removes nearly all background information.
Adjusting Clarity for Background Softness
Clarity controls local contrast and can strongly influence perceived sharpness. Reducing Clarity within a background mask can make environmental elements appear softer without completely destroying their structure. This method works especially well when a photograph requires subtle separation rather than dramatic blur.
Texture can be reduced alongside Clarity to soften fine details such as leaves, fabric, gravel, walls, or small objects. However, both adjustments should remain controlled. Excessive negative values can produce a hazy or smeared appearance. For professional Lightroom Background Blur, Lens Blur can provide the primary depth effect while Clarity and Texture adjustments provide secondary refinement.
Using Sharpness Reduction Carefully
Reducing Sharpness inside a background mask can reinforce the appearance of softness. This adjustment should normally complement Lens Blur rather than replace it. Optical blur changes the structure of edges according to simulated focus, while reducing Sharpness simply lowers perceived detail.
A good workflow starts with Lens Blur when available, followed by subtle Sharpness reduction if necessary. Compare the edited image with the original frequently. If background details remain recognizable but no longer compete with the subject, the adjustment is probably working. If objects appear melted or smeared, reduce the intensity and refine the mask.
Creating Realistic Bokeh in Lightroom
Bokeh describes the aesthetic quality of out-of-focus areas, particularly highlights rendered by a camera lens. Lightroom Lens Blur can help simulate this effect in suitable photographs. Images containing small lights, reflective highlights, foliage, or textured backgrounds can benefit from controlled bokeh adjustments.
Realistic bokeh depends heavily on the original composition. A photograph with naturally occurring bright points in the background may respond well to Lens Blur. A flat wall may simply become softer without producing meaningful bokeh characteristics. Avoid forcing dramatic circular highlights into every photograph. The best Lightroom Background Blur edits respect the visual structure already present in the image.
How Much Blur Should You Use?
There is no universal blur value suitable for every photograph. The appropriate amount depends on subject distance, background complexity, focal length, original aperture, image resolution, and intended output. A portrait with a distant background may require relatively little software blur, while a smartphone photograph with a busy background may require more selective softening.
Start with a low or moderate value and increase gradually. If the viewer immediately notices the blur before noticing the subject, the effect may be too strong. Professional editing should feel intentional but not obviously artificial. Compare the edited image with the original at 100 percent and fit-to-screen views. Both perspectives reveal different masking and blending problems.
Common Lightroom Background Blur Mistakes
One of the most common mistakes involves applying the same blur intensity everywhere. Real depth of field varies according to distance, so uniform blur can make the photograph look processed. Another mistake involves ignoring background objects that overlap the subject. These areas require careful masking because incorrect blur boundaries can create halos around the subject.
Another frequent issue is excessive negative Clarity, Texture, and Sharpness. Combining several strong adjustments can produce an unnatural painted appearance. Overly aggressive masking around hair is another problem. Instead of attempting to remove every background pixel between individual strands, use a softer transition where appropriate. Professional results depend on restraint, accuracy, and consistency.
How to Avoid Halo Effects
Haloing occurs when the blur extends into the subject or when a sharp edge remains surrounded by an unnatural transition. It is particularly visible around hair, shoulders, glasses, vehicles, buildings, and products. Halos can make an otherwise attractive Lightroom Background Blur edit look immediately artificial.
To reduce halos, inspect the mask edge at high magnification. Use Subtract or Add controls to correct the selection. Reduce blur intensity near complex edges and use feathering when appropriate. Avoid creating a hard boundary between sharp and blurred areas. The transition should resemble the optical behavior of a real lens rather than a cutout placed over a blurred photograph.
Background Blur and Color Adjustments
Blur alone may not always provide enough separation. Background color can influence how strongly an image directs attention toward the subject. A selective background mask allows photographers to reduce saturation, lower exposure slightly, or modify color temperature without changing the subject.
These adjustments should remain subtle. Darkening or desaturating the background too aggressively can create an artificial spotlight effect. Instead, use small tonal and color changes alongside blur. This combination can improve subject separation while maintaining the photograph’s original atmosphere. Lightroom’s masking system makes these adjustments easy to refine independently.
Using Exposure With Background Blur
A slight reduction in background exposure can strengthen separation, particularly when the background contains bright distractions. Lowering exposure by a small amount may help the subject become visually dominant without requiring excessive blur.
Exposure should follow the existing lighting direction. If the background is naturally bright because of sunlight, reducing it moderately may appear realistic. If the photograph has evenly distributed light, dramatic darkening can appear artificial. Combine exposure changes with Lens Blur and subtle color adjustments to create a cohesive result.
Lightroom Background Blur for Landscape Photography
Although background blur is strongly associated with portraits, landscape photographers can use selective blur for creative emphasis. A foreground object, tree, flower, person, or architectural feature can become the primary subject while distant scenery receives controlled softness.
Landscape editing requires extra restraint because environmental detail often provides the photograph’s identity. Excessive blur can remove depth cues and make the scene look unnatural. Use selective masking to soften distracting areas while retaining enough detail to communicate location and scale. This approach can create a more artistic composition without sacrificing environmental context.
Lightroom Background Blur for Food Photography
Food photography benefits from shallow visual depth because it directs attention toward the dish. A blurred table, restaurant environment, kitchen equipment, or decorative elements can make the main plate appear more prominent.
Use subject masking to protect the food and important plate details. Reduce background Texture and Clarity while applying moderate Lens Blur. Pay attention to steam, transparent glassware, utensils, and overlapping ingredients. These details may need individual masking to avoid unwanted blur artifacts. A natural edit should preserve the atmosphere of the dining environment while giving the food visual priority.
Lightroom Background Blur for Wedding Photography
Wedding photographers often work with busy environments containing guests, decorations, architecture, vehicles, and lighting equipment. Selective background blur can simplify these scenes and emphasize couples, individual portraits, rings, flowers, or emotional moments.
Wedding images usually require consistent editing across an entire gallery. Apply a repeatable workflow rather than using extreme settings for individual photographs. Create a reliable starting preset for Lens Blur and supporting adjustments, then customize each image according to subject distance and background complexity. Consistency helps maintain a professional visual style throughout the final collection.
Using Radial Gradient for Background Blur
Radial Gradient can provide a useful alternative when the subject has a simple shape or when the desired effect is primarily centered around a specific area. Create a radial mask around the subject, invert it when necessary, and use gradual adjustments outside the focal region.
The Feather control is particularly important because it determines how smoothly the effect transitions. A high feather can create a gentle falloff that resembles natural depth. Radial Gradient is less precise than detailed subject masking for complex human silhouettes, but it can be effective for products, food, landscapes, and straightforward compositions.
Using Linear Gradient for Depth Effects
Linear Gradient can create directional softness in photographs where depth follows a clear perspective. For example, a tabletop photograph may benefit from increasing blur toward the distant edge. A road or architectural scene may also support directional adjustments.
Use the gradient alongside masking rather than relying on it for complex subjects. The goal is to create a believable progression of sharpness. Combining a Linear Gradient with Lens Blur, reduced Texture, and subtle Clarity adjustments can produce a sophisticated depth effect while preserving important foreground details.
Professional Workflow for Lightroom Background Blur
A reliable professional workflow begins with global corrections. Correct exposure, white balance, contrast, and lens issues before creating detailed masks. Background blur should be applied after the basic image has a strong tonal foundation.
Next, isolate the subject, invert the mask, and create the primary blur effect. Refine edges, build additional depth zones, and adjust Texture, Clarity, Sharpness, exposure, and saturation as required. Finish by checking the photograph at different magnification levels. Export only after confirming that the subject remains natural and that no obvious masking artifacts are visible.
Lightroom Background Blur Versus Photoshop
Lightroom is often sufficient for photographers who need efficient selective background blur. Its masking system provides subject detection, brush controls, gradients, and Lens Blur in a relatively streamlined workflow. This makes it practical for processing large photography collections.
Photoshop offers more advanced pixel-level control, compositing capabilities, and detailed manual refinement. However, Lightroom can provide faster results for many everyday photographs. The best application depends on the complexity of the project. For standard portraits, products, social media images, and editorial photographs, Lightroom Background Blur can deliver professional results without requiring a full Photoshop workflow.
Tips for More Natural Background Blur
Always begin with the original image rather than assuming every photograph requires heavy blur. Examine the existing depth created by the camera lens and enhance it only where necessary. Preserve recognizable background shapes when they contribute to the story of the photograph.
Use gradual transitions and multiple depth levels whenever possible. Keep the subject sharp, but do not create an unnaturally isolated cutout. Compare the edit against the original frequently and temporarily disable the mask to evaluate whether the effect actually improves the photograph. Professional editing is often defined by subtle improvements rather than dramatic changes.
Best Lightroom Background Blur Settings
There is no fixed preset that works perfectly across every image, but a useful starting strategy is to apply moderate Lens Blur, followed by small Texture and Clarity reductions. Sharpness can be reduced slightly when additional softness is needed. Background exposure and saturation can also be adjusted carefully when distractions remain visually dominant.
For portraits, prioritize accurate subject selection and gentle edge transitions. For products, prioritize clean contours and controlled depth. For environmental images, use multiple masks to create progressive softness. These principles are more valuable than memorizing a specific numerical setting because every photograph contains different lighting, composition, and depth characteristics.
How to Make Background Blur Look Professional
Professional Lightroom Background Blur should preserve photographic realism. The subject needs clear edges, natural detail, and appropriate contrast, while the background should remain connected to the original environment. A convincing blur does not necessarily make the background unrecognizable.
The most effective technique combines several subtle adjustments rather than one extreme setting. Lens Blur establishes depth, masking controls where the effect appears, Clarity and Texture refine surface detail, and exposure or color adjustments improve separation. When these elements work together, the final image can resemble a photograph captured with a high-quality lens and wide aperture.
Exporting Photos After Background Blur
After completing the edit, inspect the image at full resolution before export. Look closely at hair, edges, small objects, reflective surfaces, and transitions between sharp and blurred regions. These areas can reveal masking problems that are not visible in the normal editing view.
Choose export settings according to the final destination. Social media images may require resized JPEG files, while professional printing and archival workflows may require higher-resolution files and appropriate color profiles. Avoid excessive compression because it can introduce artifacts that reduce the quality of subtle blur transitions.
Frequently Asked Questions
Can Lightroom Blur a Background?
Yes, Lightroom can create background blur using masking, Lens Blur, Brush, Subject selection, Radial Gradient, and other selective adjustment tools. The exact workflow depends on the photograph and Lightroom version.
Is Lightroom Background Blur Good for Portraits?
Yes. Portraits are among the strongest applications for background blur because selective softness can emphasize the face and reduce environmental distractions. Accurate masking around hair and shoulders is important.
How Do I Blur Only the Background in Lightroom?
Create a Subject mask, inspect its accuracy, invert the mask, and apply Lens Blur or other softness adjustments to the background. Refine the mask before applying strong adjustments.
Can Lightroom Create Bokeh?
Lightroom Lens Blur can simulate optical blur and bokeh characteristics in suitable photographs. Results depend on the original background, lighting, subject distance, and available Lens Blur controls.
Why Does My Lightroom Blur Look Fake?
Artificial results commonly occur because of excessive blur, hard mask edges, uniform blur intensity, or aggressive Texture and Clarity reductions. Reduce the strength and create smoother transitions.
Can I Blur a Background Without Photoshop?
Yes. Lightroom provides enough masking and Lens Blur functionality for many background blur projects. Photoshop becomes more useful when extremely detailed pixel-level manipulation is required.
Does Lightroom Background Blur Reduce Image Quality?
Selective blur itself does not damage the original RAW file because Lightroom uses non-destructive editing. Export settings, however, can affect the final file’s quality.
Can I Blur Backgrounds on Lightroom Mobile?
Lightroom Mobile supports several masking and selective editing features, although exact capabilities can depend on the application version and subscription. The same basic principles apply: isolate the subject and selectively soften the background.
What Is the Best Blur Amount in Lightroom?
There is no universal best value. Use the lowest intensity that creates the desired subject separation. Stronger blur is appropriate only when the photograph’s composition and depth support it.
Should I Reduce Clarity When Blurring a Background?
A modest Clarity reduction can complement lens blur by softening local contrast. Avoid extreme negative values because they can make the background appear hazy or artificially processed.
Final Thoughts
Lightroom Background Blur is a powerful technique for improving subject separation, reducing distractions, and creating a polished photographic appearance. With modern masking tools and Lens Blur capabilities, photographers can achieve sophisticated depth effects without relying exclusively on complex editing software.
For consistently professional results, begin with a carefully selected subject mask, create gradual depth transitions, and use Lens Blur as the primary softness effect. Refine the result using Texture, Clarity, Sharpness, Exposure, and Color adjustments only when necessary.
