

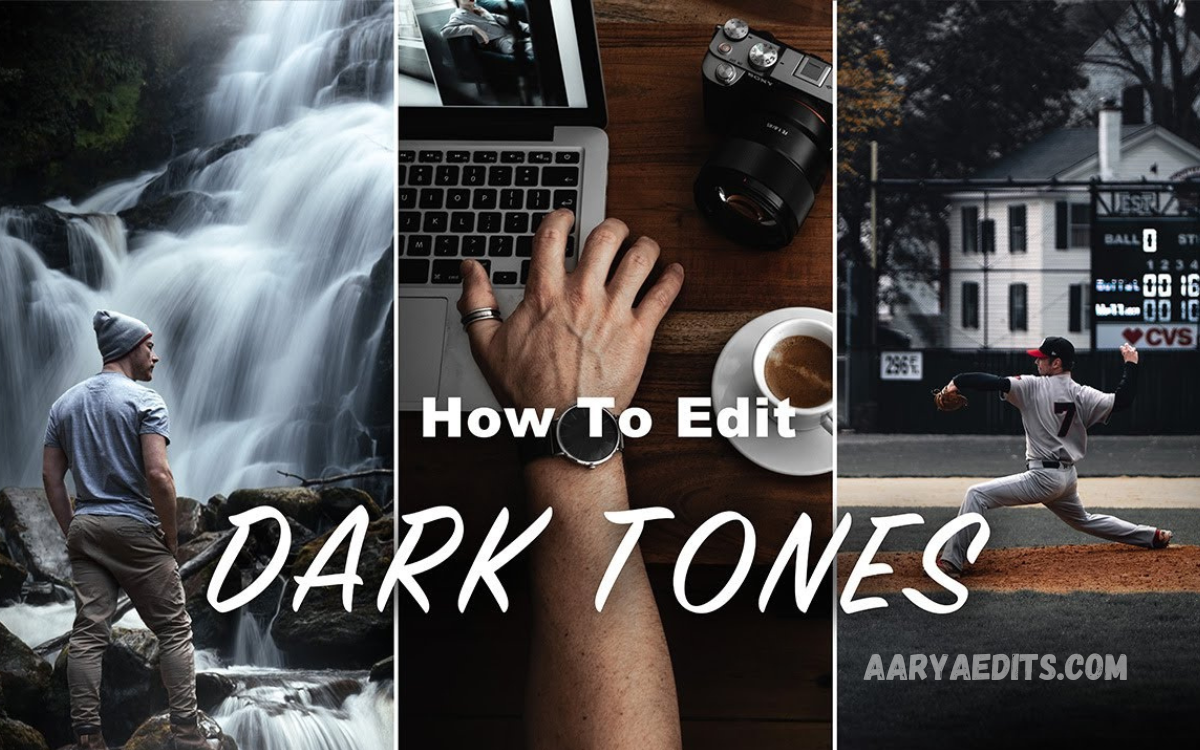
Advanced Dark Tone Photo Editing is a powerful technique for creating images with depth, emotion, contrast, and a sophisticated visual atmosphere. Instead of simply making photographs darker, this editing approach carefully controls shadows, highlights, colors, contrast, and exposure to produce a rich, cinematic appearance.
Professional photographers and content creators often use dark tones to give their images a dramatic personality. When handled correctly, darker editing can make subjects stand out, improve visual storytelling, and create a consistent style across a photography portfolio without losing important details.
What Is Advanced Dark Tone Photo Editing?
Advanced Dark Tone Photo Editing is the process of transforming an ordinary photograph into a darker, moodier, and more visually dramatic image. The technique combines exposure adjustments, shadow control, contrast enhancement, color grading, and selective brightness to achieve a balanced professional result.
The objective is not to make every part of an image extremely dark. Instead, the editor creates controlled darkness while protecting important details in the subject, background, skin, clothing, and other visual elements. This balance separates professional dark editing from simple brightness reduction.
Why Is Dark Tone Editing Popular?
Dark tone photography has become popular because it creates a strong emotional impact. Deep shadows and muted colors can make photographs appear mysterious, elegant, cinematic, luxurious, or dramatic depending on the editing choices and original subject.
This style is particularly effective for portraits, fashion photography, street photography, architecture, travel images, cars, products, and creative compositions. A carefully edited dark photograph can attract attention because the viewer naturally focuses on the brightest and most important areas.
Adjusting Exposure for Darker Images
Exposure is one of the most important controls in Advanced Dark Tone Photo Editing. Reducing exposure slightly can establish a darker foundation, but excessive reduction may remove details and make the photograph look flat or underexposed.
Professional editing requires gradual adjustments rather than dramatic changes. The goal is to create a darker overall appearance while maintaining enough brightness around the primary subject so that the photograph remains clear, attractive, and visually balanced.
Controlling Shadows and Highlights
Shadows are essential for creating a dark and cinematic appearance. Lowering shadow brightness can add depth and make the background appear richer, while carefully managing darker areas prevents the image from becoming completely black.
Highlights also require attention because bright areas provide contrast against the darker portions of the photograph. Reducing excessive highlights can protect details in skies, windows, reflective surfaces, and bright clothing while helping the entire image maintain a controlled tonal range.
Creating Strong Contrast
Contrast gives a dark photograph its visual strength. Increasing contrast can separate light areas from shadows, producing a more dramatic appearance and making important elements stand out against darker surroundings.
However, excessive contrast can destroy subtle details and create harsh transitions. A professional approach uses moderate contrast combined with targeted tonal adjustments so that the image remains natural while developing the desired dramatic character.
Using Black Levels Effectively
Black levels can significantly influence the mood of an edited photograph. Deepening blacks gives the image stronger foundations and can create a premium, cinematic appearance when used carefully.
The best results come from controlling black levels without crushing every shadow. Some texture should remain visible in darker regions, especially around hair, clothing, buildings, furniture, and environmental details. This creates depth instead of a completely flat black appearance.
Dark Tone Color Grading
Color grading is another major part of Advanced Dark Tone Photo Editing. Dark images can become more sophisticated when colors are adjusted toward specific tones such as deep blue, muted green, warm brown, charcoal, or subtle neutral shades.
A consistent color palette helps create a recognizable editing style. Instead of increasing saturation everywhere, professionals often reduce distracting colors and emphasize selected tones that support the mood, subject, and environment of the photograph.
Creating a Cinematic Appearance
A cinematic appearance usually combines controlled contrast, deep shadows, balanced highlights, and carefully selected colors. The result should feel atmospheric without appearing excessively processed or artificial.
Cinematic dark editing works especially well when the photograph already contains directional lighting. Areas naturally affected by light can remain brighter while surrounding elements become darker, creating visual separation and guiding the viewer toward the main subject.
Editing Portraits With Dark Tones
Portrait photography can benefit greatly from dark tone editing because darker backgrounds help direct attention toward the person. Carefully controlled shadows can also create depth around the face, hair, clothing, and surrounding environment.
Skin tones should receive special attention during the process. Dark editing should not make skin appear gray, overly orange, or unnaturally pale. Maintaining realistic skin color while darkening the surrounding environment produces a more professional portrait.
Dark Tone Editing for Street Photography
Street photography often contains strong natural contrast, making it an excellent subject for dark tone editing. Buildings, roads, signs, vehicles, and people can become more dramatic when unnecessary brightness is reduced.
A muted color palette can also make urban scenes appear more atmospheric. Combining deep shadows with selected highlights can emphasize architecture, movement, and human subjects while giving ordinary street scenes a distinctive visual identity.
Using Selective Brightness
Selective brightness allows an editor to control where the viewer looks first. Instead of brightening the entire image, specific areas can be preserved or enhanced while less important regions remain dark.
This technique is particularly useful for portraits and product photography. A brighter face, object, or light source surrounded by darker tones naturally becomes the focal point, creating stronger composition and visual storytelling.
Read Also: Lightroom Mobile Editing Tutorial: A Complete Guide for Beginners
Maintaining Image Details
One of the biggest challenges in dark editing is preserving detail. When shadows and blacks are reduced too aggressively, textures can disappear, and important elements may become difficult to recognize.
Professional editing therefore requires regular examination of dark areas. Zooming into important regions and checking textures helps ensure that the final image remains detailed, especially when it will be displayed on different screens or printed.
Choosing the Right Dark Tone Style
There is no single dark tone style that works for every photograph. A portrait may benefit from warm shadows, while a cityscape could look stronger with cooler tones and neutral highlights.
The original lighting, subject, background, and intended purpose should determine the final style. Understanding these factors helps an editor create a dark appearance that complements the photograph rather than forcing the same preset or adjustment onto every image.
Common Mistakes in Dark Tone Editing
One common mistake is making the entire photograph too dark. When every area has similar brightness, the image loses depth and the subject can disappear into the background. Dark editing should always include tonal variation.
Another mistake is excessive saturation or unnatural color grading. Dark photographs usually benefit from controlled colors rather than extreme adjustments. Keeping colors harmonious creates a cleaner and more professional result.
Advanced Dark Tone Photo Editing Workflow
A reliable workflow begins with exposure and white balance before moving toward contrast, shadows, highlights, blacks, and color adjustments. Making foundational corrections first gives the editor better control over the final appearance.
After the basic adjustments, selective edits can refine the subject and background separately. Final sharpening, noise control, and careful review at normal viewing size can then help ensure the finished photograph looks polished and consistent.
How Lighting Affects Dark Editing
The quality and direction of the original lighting strongly influence the final result. Side lighting, backlighting, window light, and low-light environments can naturally create shadows that make dark editing easier and more convincing.
Images with completely flat lighting may require more careful adjustments to produce depth. In these situations, selective contrast and localized brightness can help create separation without making the photograph look artificially dark.
Dark Tone Editing for Professional Branding
Dark photography can create a sophisticated visual identity for brands, especially in fashion, automotive, luxury products, technology, and creative industries. A consistent dark color palette can make website galleries and social media profiles appear more cohesive.
Branding benefits from consistency rather than excessive effects. Using similar tonal relationships, contrast levels, and color characteristics across multiple photographs can establish a recognizable visual style that audiences associate with the brand.
Benefits of Advanced Dark Tone Photo Editing
The main benefit of Advanced Dark Tone Photo Editing is its ability to add depth and emotion to ordinary photographs. Carefully controlled darkness can make an image feel more dramatic while directing attention toward the most important visual elements.
Another advantage is creative flexibility. Dark tones can be elegant, mysterious, modern, cinematic, dramatic, or artistic depending on the combination of lighting and color. This makes the technique useful across many photography genres and creative projects.
Tips for Better Dark Tone Results
Always begin with a high-quality original photograph whenever possible. Images with good exposure and sufficient detail provide more flexibility because shadows can be adjusted without introducing excessive noise or losing important information.
It is also helpful to regularly compare the edited version with the original. This prevents gradual over-editing and makes it easier to identify changes that improve the photograph versus adjustments that simply make it darker.
Frequently Asked Questions
What is Advanced Dark Tone Photo Editing?
Advanced Dark Tone Photo Editing is a professional technique for creating darker, moodier images through controlled exposure, shadows, highlights, contrast, blacks, and color grading while preserving important details.
Is dark tone editing the same as making a photo darker?
No. Professional dark editing involves much more than reducing brightness. It uses tonal control, color adjustments, selective brightness, and contrast to create depth while keeping the main subject visible.
Which photos work best with dark tones?
Portraits, fashion images, cars, architecture, street photography, products, travel photographs, and cinematic compositions often work particularly well with dark tonal styles.
How can I avoid losing details in shadows?
Avoid reducing shadows and blacks too aggressively. Make gradual adjustments and regularly check dark areas for texture, edges, and important visual information.
Should dark photos have high contrast?
Dark photographs often benefit from increased contrast, but excessive contrast can remove detail. Moderate contrast combined with controlled shadows usually produces a more professional result.
Are warm or cool tones better for dark photography?
Both can work effectively. Warm tones can create a luxurious or nostalgic mood, while cool tones can produce a modern, mysterious, or cinematic appearance. The choice depends on the subject and desired atmosphere.
How do I keep skin tones natural?
Protect the original skin color while adjusting the surrounding tones. Avoid excessive saturation and monitor skin carefully when applying global color grading or shadow adjustments.
Can dark tone editing work for product photography?
Yes. Dark tones can create a premium appearance for products, especially when the subject is properly illuminated and separated from the darker background.
What is the biggest dark editing mistake?
Making the entire image equally dark is one of the biggest mistakes. Strong photographs usually contain a clear relationship between shadows, midtones, and highlights.
How can I make dark edits look professional?
Use gradual adjustments, preserve important details, maintain natural colors, create clear subject separation, and keep the final tonal style consistent with the original lighting and photographic purpose.
Conclusion
Advanced Dark Tone Photo Editing is an effective way to transform ordinary photographs into dramatic, atmospheric, and professional-looking images. By carefully controlling exposure, shadows, highlights, contrast, black levels, and colors, editors can create depth without sacrificing important details.
The most successful dark photographs are not simply underexposed images. They are carefully balanced compositions where darkness supports the subject, lighting creates separation, and colors strengthen the intended mood.
