

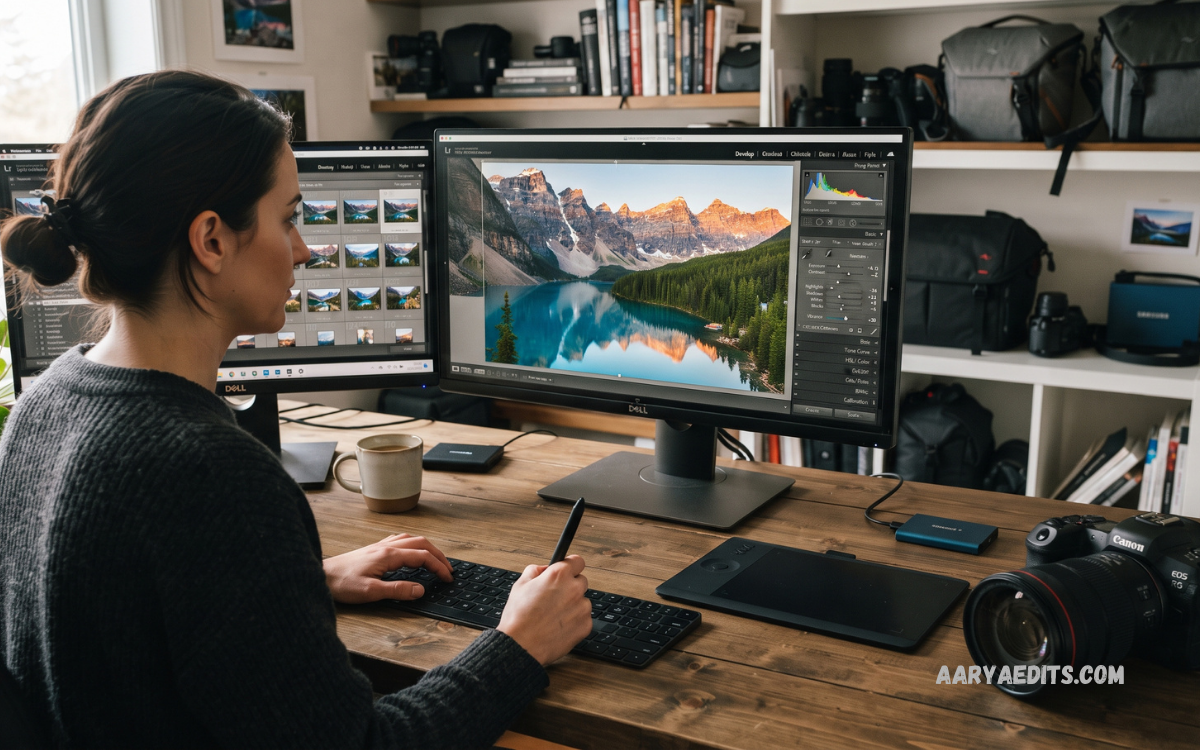
Lightroom RAW Photo Editing gives photographers precise control over image exposure, color, detail, contrast, and creative style. RAW files preserve significantly more image information than compressed formats, allowing editors to recover highlights, lift shadows, refine white balance, and produce cleaner final photographs.
Modern photography often depends on efficient post-processing. Lightroom makes RAW editing practical by bringing essential adjustments into one interface, including exposure correction, color grading, lens corrections, masking, noise reduction, sharpening, cropping, and export controls.
What Is a RAW Photo?
A RAW photo contains minimally processed information captured directly by a camera sensor. Unlike JPEG files, which are processed and compressed inside the camera, RAW files retain greater editing flexibility. This additional information gives photographers more freedom when correcting difficult lighting conditions or creating a specific visual style.
RAW files also preserve camera-specific data that Lightroom can interpret during processing. Depending on the camera manufacturer and model, RAW formats may use extensions such as CR3, NEF, ARW, RAF, ORF, or DNG. Lightroom can process many supported RAW formats while providing non-destructive editing tools.
Why Use Lightroom RAW Photo Editing?
Lightroom RAW Photo Editing is valuable because it allows adjustments without permanently changing the original RAW file. Lightroom records editing instructions rather than directly replacing the source image, making it possible to experiment with different looks and return to the original version whenever necessary.
RAW editing is particularly useful for photographs captured under challenging conditions. An image that appears too dark, too bright, overly warm, or lacking contrast may contain recoverable information. Lightroom provides tools that help reveal that information while maintaining a controlled and professional workflow.
Importing RAW Photos Into Lightroom
A strong editing workflow begins with organized importing. Before making adjustments, create a logical folder structure or use Lightroom collections to organize photographs according to projects, dates, locations, or events. Proper organization becomes increasingly important when working with large photo libraries.
During import, review available options for file handling, metadata, previews, and destination folders. Avoid unnecessary duplication of RAW files because large photographic projects can consume substantial storage space. A consistent import process helps maintain an efficient catalog and simplifies future editing.
Understanding the Lightroom Develop Workflow
The Develop workspace contains the primary controls required for RAW processing. A professional workflow generally starts with technical corrections before moving toward creative adjustments. This prevents stylistic edits from hiding exposure, color, or lens-related problems.
A practical sequence is exposure, white balance, contrast, highlights, shadows, whites, blacks, texture, clarity, dehaze, color adjustments, detail, lens corrections, masking, and final creative refinement. The exact order can change depending on the photograph, but working systematically reduces inconsistent results.
Exposure Correction
Exposure is one of the most important adjustments in RAW editing. The Exposure slider changes overall brightness, while Highlights and Shadows provide more targeted control. This separation makes it possible to improve tonal balance without unnecessarily affecting the entire photograph.
When correcting exposure, use the histogram as a reference instead of judging brightness solely from the monitor. The histogram helps identify whether important tonal information is concentrated too heavily toward the shadows or highlights. Avoid extreme corrections that create unnatural tones or excessive noise.
White Balance and Color Temperature
White balance determines whether an image appears warm, cool, or neutral. Incorrect white balance can make skin tones look unnatural and can change the mood of landscapes, interiors, and street photography.
Lightroom provides Temperature and Tint controls for manual correction, along with white-balance presets and sampling tools. For professional results, compare neutral objects within the scene and consider the intended mood before finalizing the color temperature.
Highlights, Shadows, Whites, and Blacks
The Highlights slider controls brighter areas, while Shadows affects darker regions. Whites and Blacks influence the brightest and darkest tonal points. Together, these controls provide detailed management of dynamic range.
A common RAW editing technique involves reducing excessive highlights while gently raising shadows. Whites and Blacks can then be adjusted to restore contrast. The objective is not to eliminate every bright or dark area but to create a balanced tonal structure that retains visual depth.
Contrast and Clarity
Contrast controls the difference between lighter and darker areas. Increasing contrast can create a stronger appearance, while reducing it can produce a softer result. Contrast should complement the photograph rather than overpower its natural tonal relationships.
Texture and Clarity affect local detail differently. Texture can emphasize fine structures, while Clarity influences midtone contrast. Excessive use can produce harsh skin, unnatural edges, or an overly processed appearance. Subtle adjustments usually create more professional results.
Color Mixer for Precise Color Control
Lightroom’s Color Mixer allows individual color ranges to be adjusted. Hue changes the character of a selected color, Saturation controls its intensity, and Luminance changes its brightness.
This tool is especially useful for landscape, portrait, product, and social media photography. Instead of increasing global saturation, selectively refine specific colors. This approach helps maintain natural skin tones while enhancing environmental colors or controlling distracting elements.
Color Grading
Color Grading provides additional control over the visual relationship between shadows, midtones, and highlights. Photographers can introduce subtle color variations to create a cinematic, warm, cool, dramatic, or atmospheric appearance.
Professional color grading generally works best when used subtly. Strong color shifts can quickly make photographs appear artificial. Consider the lighting, subject, environment, and intended audience before applying significant color changes.
Lightroom Masking Tools
Masking allows photographers to apply adjustments to specific areas instead of modifying the entire image. Lightroom offers tools such as Select Subject, Select Sky, Brush, Linear Gradient, Radial Gradient, and other selection options.
Masking is useful for brightening a subject, darkening a background, improving a sky, controlling facial exposure, or directing attention toward an important area. Local adjustments can significantly improve an image when global adjustments are insufficient.
Portrait RAW Editing
Portrait editing requires careful attention to exposure, skin color, texture, and background separation. Begin with accurate white balance and balanced exposure before making subtle skin-related adjustments.
Avoid excessive smoothing or clarity changes that remove natural facial texture. Masking can help refine exposure on the subject while keeping the surrounding environment controlled. The goal should be a polished photograph that still looks authentic.
Landscape RAW Editing
Landscape photography often benefits from controlled dynamic range, accurate color, and selective detail enhancement. Start by correcting exposure and white balance, then manage highlights and shadows to establish a balanced tonal foundation.
Selective masking can improve skies, foregrounds, or distant landscape elements. Color Mixer adjustments can refine greens, blues, yellows, and other environmental tones. Moderate texture and dehaze adjustments may add definition, but excessive values can make landscapes look unrealistic.
Noise Reduction
High ISO photography can introduce visible digital noise, particularly in shadow areas. Lightroom provides noise-reduction controls designed to improve image quality while preserving useful detail.
Noise reduction should be applied carefully because excessive processing can make photographs appear soft or artificial. For images captured in low light, balance noise reduction with sharpening and evaluate the photograph at an appropriate zoom level.
Sharpening RAW Photos
Sharpening enhances the appearance of edges and fine detail. Lightroom provides controls for Amount, Radius, Detail, and Masking, allowing photographers to customize sharpening according to the image.
Images with significant fine detail may require different sharpening settings from portraits or photographs containing large smooth areas. Masking can help limit sharpening to stronger edges, reducing unnecessary enhancement in smooth regions.
Lens Corrections
Lens imperfections can affect photographs through distortion, vignetting, and chromatic aberration. Lightroom includes lens correction features that can automatically apply profiles when supported.
Enable appropriate lens corrections when necessary, particularly for architectural, interior, and wide-angle photography. Chromatic aberration correction can also reduce unwanted color fringing around high-contrast edges.
Cropping and Composition
Cropping is more than removing unwanted areas. It can strengthen composition, improve subject placement, and adapt an image for different platforms. Lightroom provides aspect-ratio options that make it easier to prepare photographs for websites, portfolios, social media, and print.
Before cropping, consider the photograph’s visual balance and intended destination. Preserve sufficient resolution when possible, particularly when the image may later be printed or used in larger formats.
Using Lightroom Presets
Presets apply a collection of editing adjustments quickly. They can accelerate repetitive workflows and provide a consistent visual identity across a series of photographs.
Presets should be treated as starting points rather than automatic solutions. Lighting conditions vary between photographs, so exposure, white balance, color, and masking often require additional adjustments after applying a preset.
Creating Your Own Presets
Custom presets can improve consistency across personal projects. After developing a preferred editing style, save appropriate settings as a preset and apply them to photographs with similar lighting conditions.
Avoid including adjustments that should vary between photographs, such as exposure or white balance, unless the images were captured under highly consistent conditions. A flexible preset generally produces better results than one containing every possible adjustment.
Batch Editing
Batch editing is useful when processing large collections of photographs. Lightroom allows settings to be synchronized across selected images, reducing repetitive work.
For consistent results, first edit one representative photograph carefully. Synchronize appropriate settings across similar images, then review individual photographs and make necessary corrections. This approach combines efficiency with quality control.
Lightroom RAW Editing for Mobile
Lightroom’s mobile workflow makes RAW editing accessible on compatible smartphones and tablets. Mobile editing can be useful for photographers who need to review, organize, or refine images while away from a desktop computer.
Touch-based controls provide access to many familiar adjustment categories. However, demanding projects may still benefit from a larger display and more precise input. Cloud-based workflows can also help maintain access to photographs and edits across supported devices and platforms.
Read Also: Lightroom Film Presets: Transform Your Photos With Professional Film Looks
Export Settings for Final Photos
After editing, export settings determine how the finished image is delivered. JPEG remains practical for websites and general sharing, while other formats may be appropriate for specific professional workflows.
Choose the color space, dimensions, quality, resolution, and sharpening settings according to the destination. Website images often require smaller dimensions and optimized file sizes, whereas print workflows may require larger files and specific color-management requirements.
Common Lightroom RAW Editing Mistakes
One common mistake is excessive editing. Raising saturation, clarity, texture, contrast, or dehaze too aggressively can produce unnatural results. Another mistake is correcting every tonal area until the photograph loses its original mood and depth.
Ignoring white balance is another frequent problem. Color adjustments made on top of an incorrect white balance can create inconsistent skin tones and environmental colors. A structured workflow helps prevent these issues and produces more predictable results.
Professional Tips for Better RAW Editing
Always begin with the highest-quality original file available. Evaluate exposure before applying creative effects, use the histogram when necessary, and zoom in to inspect important details without spending the entire workflow at extreme magnification.
Make adjustments with the final purpose in mind. A photograph intended for a portfolio may require a different treatment from one prepared for a mobile screen or printed publication. Consistency, restraint, and careful observation are key characteristics of professional RAW processing.
Frequently Asked Questions
What are the Best Display Phones 2026?
The Best Display Phones 2026 offer advanced AMOLED or OLED panels, high brightness, smooth 120Hz refresh rates, excellent color accuracy, HDR support, and sharp resolutions for an impressive viewing experience.
Which phone has the best display in 2026?
Premium flagship smartphones generally provide the best displays in 2026, combining high brightness, excellent contrast, accurate colors, adaptive refresh rates, and advanced HDR capabilities.
Is AMOLED better than LCD?
AMOLED displays generally deliver deeper blacks, stronger contrast, vibrant colors, and excellent viewing quality. LCD displays can still provide good brightness and color accuracy at a lower price.
Is a 120Hz display worth it?
Yes. A 120Hz refresh rate makes scrolling, animations, gaming, and everyday navigation feel noticeably smoother than 60Hz displays.
What makes a phone display good?
A high-quality phone display combines brightness, resolution, color accuracy, contrast, refresh rate, HDR support, viewing angles, and touch responsiveness.
Is higher screen resolution always better?
Not necessarily. Higher resolution can improve sharpness, but display brightness, panel quality, pixel density, color accuracy, and contrast also have a major impact on the viewing experience.
Are OLED displays good for gaming?
Yes. OLED displays offer fast response times, excellent contrast, and vibrant visuals, making them well suited for gaming and other demanding multimedia experiences.
What screen size is best for a smartphone?
A screen between approximately 6.3 and 6.8 inches provides a good balance between viewing space, gaming, video streaming, and comfortable everyday handling.
Why is display brightness important?
High brightness improves outdoor visibility and makes content easier to view in direct sunlight. It also helps compatible HDR content appear more impressive.
What should I consider before buying a phone for its display?
Check the display technology, refresh rate, resolution, brightness, HDR support, color accuracy, adaptive refresh features, screen protection, and touch response before making a purchase.
Conclusion
Lightroom RAW Photo Editing provides a powerful workflow for transforming camera RAW files into polished photographs while maintaining extensive control over exposure, color, detail, composition, and local adjustments. Its non-destructive approach allows photographers to experiment without permanently altering the original image.
The best results come from understanding the purpose of each tool rather than relying entirely on presets or aggressive adjustments. By developing a consistent workflow, using masking carefully, controlling color, preserving natural detail, and selecting appropriate export settings, photographers can turn RAW captures into professional-quality images suitable for digital publishing, portfolios, and print.
