

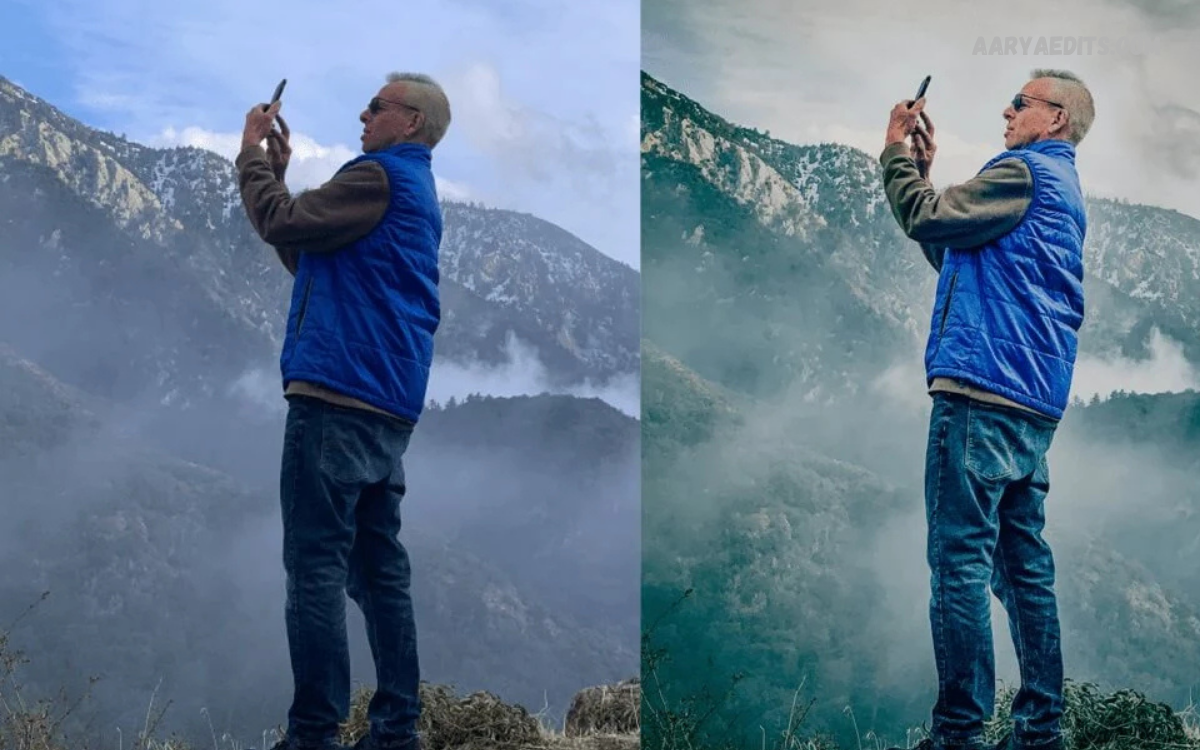
Lightroom Color Grading is one of the most powerful techniques for transforming the mood, atmosphere, and visual identity of a photograph. It allows photographers and editors to control the colors within shadows, midtones, and highlights independently, creating a balanced and professional appearance.
Adobe Lightroom provides dedicated Color Grading controls that make advanced color manipulation accessible without requiring complicated professional color-grading software. By combining hue, saturation, and luminance adjustments with the Color Grading wheels, photographers can create warm cinematic images, cool moody photographs, vibrant outdoor scenes, or subtle editorial looks.
What Is Lightroom Color Grading?
Lightroom Color Grading is the process of adding and balancing specific colors across the shadows, midtones, and highlights of an image. Instead of changing every color globally, the Color Grading panel allows editors to target different tonal ranges.
The technique evolved from traditional color-grading workflows used in photography, film, and cinematography. Modern Lightroom tools simplify this process through intuitive color wheels and adjustment controls.
Why Lightroom Color Grading Matters
Color strongly influences how viewers interpret an image. Warm orange and yellow tones can evoke comfort, energy, and nostalgia, while blue and cyan tones often create cooler, calmer, or more dramatic moods. Lightroom color grading enables photographers to deliberately shape these emotional qualities rather than relying entirely on the colors captured by the camera.
Professional editing also requires consistency. A recognizable color style can help photographers establish a visual identity across portfolios, websites, magazines, and social media platforms. By developing a controlled Lightroom Color Grading workflow, editors can maintain similar tonal relationships across an entire collection while still making individual adjustments for lighting and subject differences.
Understanding the Lightroom Color Grading Panel
The Color Grading panel generally provides separate controls for Shadows, Midtones, and Highlights, along with a Global adjustment. Each tonal range can receive its own hue and saturation settings. The interface also provides luminance and blending controls that help determine how strongly the colors interact with the original image.
Understanding each control is essential before creating advanced looks. Hue determines the actual color selected, while saturation controls its intensity. Luminance affects brightness within the selected tonal range, and blending determines how smoothly different tonal colors transition into one another. Balance can shift the overall influence between shadows and highlights.
Shadows Color Grading
Shadows contain the darker tonal information of an image, including deep areas, clothing details, backgrounds, and darker portions of the environment. Adding a subtle color to these areas can dramatically influence the atmosphere of a photograph. Blue, cyan, green, purple, and teal are frequently used for creative shadow treatments.
A common cinematic approach involves introducing a small amount of blue or teal into shadows while keeping highlights warmer. This creates color separation that can make photographs appear more polished and visually dimensional. However, shadow saturation should remain controlled because excessive color can make dark areas look unnatural or muddy.
Midtones Color Grading
Midtones represent a large portion of the visible image and often contain important subject details. In portraits, skin frequently falls within the midtone range, making careful adjustments especially important. Subtle warmth can enhance portraits, while cooler midtones can produce an editorial or atmospheric appearance.
Professional editors should examine midtones at different zoom levels before applying strong adjustments. A color that appears attractive on a small screen may become distracting when viewed at full resolution. Small changes to hue and saturation can produce sophisticated results without destroying the natural character of the original photograph.
Highlights Color Grading
Highlights contain the brighter portions of an image, including sunlight, bright skin areas, reflective surfaces, clouds, and illuminated backgrounds. Warm highlights are popular for portrait, wedding, travel, and lifestyle photography because golden colors can create a pleasing sense of light.
Adding yellow, orange, peach, or warm red to highlights can produce a sunset-inspired appearance. Cooler highlights can create a modern, clean, or winter-like aesthetic. The best approach depends on the lighting conditions and creative direction. Highlight grading should complement the existing light rather than compete with it.
Global Color Grading
Global Color Grading applies a color influence across the entire image rather than targeting only shadows, midtones, or highlights. This control can help establish an overall color atmosphere after individual tonal ranges have been adjusted.
Because global adjustments affect the entire photograph, they should usually be applied with restraint. A subtle global tint can unify an image, while an aggressive adjustment can make skin tones, neutral objects, and backgrounds appear unrealistic. Professional workflows generally use Global Color Grading as a finishing adjustment rather than the primary color treatment.
How to Use Hue in Lightroom Color Grading
Hue determines the position of a color within the color spectrum. Lightroom allows editors to choose specific hues for different tonal ranges, making it possible to create combinations such as teal shadows and warm highlights.
The key is to understand color relationships rather than selecting colors randomly. Complementary colors can create strong separation, while analogous colors can produce harmonious and subtle results. For example, blue shadows paired with orange highlights create contrast because these colors sit relatively opposite each other on the color wheel.
How to Control Saturation
Saturation determines how intense the selected color appears. High saturation creates obvious and dramatic color effects, while low saturation produces subtle tonal shifts.
For professional photography, lower saturation is often more effective. A restrained color grade can influence mood without making the photograph look artificially processed. When editing a large collection, consistent saturation levels can also help maintain visual harmony between photographs captured under different lighting conditions.
Using Luminance for Better Color Balance
Luminance controls the brightness associated with a color grade. This adjustment is particularly useful when a color treatment makes shadows too dark or highlights too bright.
A good Lightroom Color Grading workflow considers both color and tonal structure. If a shadow color is attractive but causes important details to disappear, adjusting luminance can restore visual information. Similarly, highlight luminance can help maintain bright details while preserving a warm or cool color treatment.
Understanding Blending
Blending controls how smoothly the color adjustments transition between tonal ranges. Low blending can create more distinct separation, while higher blending generally produces smoother transitions.
Natural-looking photographs often benefit from moderate blending. Excessively separated colors can create visible tonal boundaries, while excessive blending can make different color adjustments difficult to distinguish. The ideal setting depends on the photograph, contrast level, and desired visual style.
Understanding Balance
Balance determines the relative influence of shadow and highlight color grading. Moving the balance toward shadows gives greater visual emphasis to the shadow color, while shifting it toward highlights increases the influence of highlight grading.
This control becomes particularly useful when using complementary color combinations. For example, a photograph with cool shadows and warm highlights can be adjusted so the warmer tones dominate without completely removing the cooler atmosphere from darker areas.
Lightroom Color Grading for Portrait Photography
Portrait photography requires careful color management because skin is highly sensitive to unnatural color shifts. The goal should generally be to enhance skin while maintaining believable complexion and natural lighting.
Warm highlights can complement skin, while subtle cooler tones in shadows can provide separation and depth. Avoid applying strong colors to midtones without checking the subject’s face carefully. If skin becomes orange, red, purple, or green, reduce saturation or adjust the tonal range until the complexion looks natural again.
Lightroom Color Grading for Wedding Photography
Wedding photographs often benefit from elegant, warm, and timeless color treatments. Soft golden highlights combined with slightly cooler shadows can create depth while preserving the romantic atmosphere associated with wedding imagery.
Consistency is particularly important for wedding collections because hundreds of photographs may be viewed together. A carefully designed Lightroom Color Grading preset can establish a recognizable visual style, but each image should still receive individual exposure and white-balance corrections before the final color grade is applied.
Lightroom Color Grading for Landscape Photography
Landscape photography offers greater creative freedom because natural scenes contain diverse colors, textures, and tonal ranges. Blue shadows, green midtones, and warm highlights can emphasize depth and environmental contrast.
Sunset landscapes are especially suitable for warm highlight grading. Golden, orange, and red tones can intensify the appearance of sunlight, while cooler shadows can maintain dimensional contrast. The goal should be enhancement rather than replacing the natural color relationships captured in the original scene.
Creating a Cinematic Look
A cinematic color grade often relies on controlled contrast between cooler shadows and warmer highlights. This approach can create visual separation and a sense of atmosphere that resembles contemporary film aesthetics.
Begin with accurate exposure and white balance before applying color grading. Introduce a subtle cool tone into the shadows and a restrained warm tone into the highlights. Adjust blending and balance until the transition feels smooth. Cinematic editing works best when color supports composition, lighting, and storytelling rather than becoming the primary subject.
Creating a Moody Lightroom Color Grade
Moody photography generally benefits from deeper shadows, controlled highlights, reduced saturation, and carefully selected cool or earthy colors. Lightroom Color Grading can reinforce this atmosphere by introducing blue, teal, green, or muted purple into darker tonal areas.
Avoid simply lowering exposure and increasing saturation. A professional moody look requires tonal control. Preserve important details in the shadows, maintain enough contrast for dimensionality, and use color selectively. The strongest moody edits usually appear understated rather than heavily processed.
Creating a Warm Golden Look
Warm color grading is popular for portraits, weddings, travel photography, lifestyle content, and sunset images. Golden highlights can make photographs feel inviting and energetic.
To create this effect, correct the white balance first, then introduce subtle yellow, orange, or warm red into the highlights. A slightly warm midtone adjustment can complement the look, while neutral or mildly cool shadows can prevent the entire image from becoming excessively orange.
Creating a Teal and Orange Look
Teal and orange grading is a widely recognized color combination because warm skin tones can contrast effectively against cool environmental colors. Lightroom Color Grading makes it possible to create this effect without manually changing every object in the photograph.
Use restrained teal or cyan in the shadows and subtle orange warmth in the highlights. Pay close attention to skin tones, because excessive orange can quickly produce an artificial appearance. The most professional versions of this style are usually much more subtle than heavily edited social media examples.
Lightroom Color Grading for Instagram Photos
Social media photography often benefits from a consistent visual identity. Lightroom Color Grading can help create a recognizable appearance across portraits, lifestyle photographs, travel images, and product content.
Before exporting, review photographs together rather than editing each image independently. Consistent shadow colors, highlight warmth, contrast, and saturation can make an Instagram feed look more cohesive. However, avoid forcing identical settings onto every photograph because different lighting conditions require different adjustments.
Using Color Grading With HSL
The HSL panel and Color Grading panel serve different purposes and work particularly well together. HSL allows photographers to adjust specific color families such as red, orange, yellow, green, aqua, blue, purple, and magenta.
Color Grading focuses on tonal relationships, while HSL provides more targeted color control. A professional workflow might use HSL to refine foliage or skin-related colors and Color Grading to establish the overall mood. Using both tools carefully provides greater precision than relying on either one alone.
Color Grading and White Balance
White balance should generally be corrected before creative color grading. Temperature and Tint establish the photograph’s fundamental color neutrality, while color grading adds intentional creative color.
If white balance is incorrect, color grading can become unnecessarily difficult. For example, an overly warm image may require excessive cooling in the shadows simply to restore balance. Correcting white balance first creates a cleaner foundation for creative decisions.
Read Also: Professional Lightroom Face Retouching: Complete Guide for Natural, High-End Portrait Editing
Color Grading and Contrast
Color and contrast work together to determine the perceived depth of an image. Strong contrast can make color differences more pronounced, while low contrast can create a softer appearance.
When applying Lightroom Color Grading, repeatedly check the relationship between color and tonal structure. A dark cinematic grade may need enough contrast to preserve separation, while a bright editorial image may benefit from softer transitions. Avoid treating color and contrast as completely independent adjustments.
Common Lightroom Color Grading Mistakes
One of the most common mistakes is using excessive saturation. Strong color can initially look impressive, but it often becomes distracting after extended viewing. Another mistake is applying the same color treatment to every tonal range without considering how the photograph’s lighting naturally behaves.
Ignoring skin tones is another frequent problem. Portrait edits can quickly become unnatural when midtones receive aggressive color changes. Other mistakes include skipping white-balance correction, crushing shadows, clipping highlights, and using presets without making image-specific adjustments.
How to Build a Professional Color Grading Workflow
Start by correcting exposure, white balance, highlights, shadows, and contrast. Next, refine important colors using HSL or Color Mixer controls. Once the fundamental image is balanced, move to the Color Grading panel.
Adjust shadows first, then midtones and highlights. Keep saturation relatively low while experimenting with hue. After establishing the color relationships, fine-tune luminance, blending, and balance. Finally, compare the edited image against the original and review the photograph at both fit-to-screen and 100 percent views.
How to Create Lightroom Color Grading Presets
Presets can accelerate editing by saving repeatable color settings. A useful preset should establish a creative foundation rather than attempt to solve every exposure, white-balance, and lighting condition automatically.
Create the color treatment on a well-exposed reference image. Once the look is consistent, save the relevant Color Grading, HSL, tone, and other desired settings as a preset. Test the preset on several photographs captured under different conditions before using it for professional projects.
Natural vs Creative Color Grading
Natural color grading aims to enhance existing colors while preserving realistic appearance. It is commonly preferred for professional portraits, documentary work, weddings, real estate, and commercial photography where accurate representation matters.
Creative color grading intentionally changes the color atmosphere to communicate a particular mood or visual concept. Fashion editorials, cinematic photography, music imagery, and artistic projects often provide greater freedom. Neither approach is universally superior; the correct choice depends on the project’s purpose.
Professional Color Grading Tips
Always make technical corrections before creative adjustments. Work gradually, use reference images, and avoid judging color under unusual display conditions. A calibrated or reasonably accurate monitor can improve consistency, especially for professional work.
Use color relationships intentionally instead of choosing hues randomly. Complementary colors can create contrast, analogous colors can create harmony, and neutral colors can provide visual rest. Most importantly, zoom out frequently to judge the overall effect rather than focusing only on individual pixels.
Lightroom Color Grading for Different Lighting Conditions
Natural daylight, golden-hour light, indoor lighting, fluorescent environments, and artificial studio lighting each respond differently to color grading. A setting that looks excellent under sunset lighting may look excessive under neutral daylight.
For this reason, professional editors adapt their color grade to the lighting environment. Examine the original light source, white balance, contrast, and subject colors before applying a creative treatment. This approach produces more consistent results than relying entirely on fixed numerical settings.
Mobile Lightroom Color Grading
Lightroom Mobile provides powerful editing capabilities for photographers who work primarily from smartphones or tablets. Color Grading can be used to create professional-looking adjustments without requiring a desktop workflow.
The principles remain the same: correct exposure and white balance, establish tonal separation, select complementary colors, and maintain controlled saturation. Mobile editing can produce excellent results when the editor evaluates the image carefully and avoids excessive adjustments.
Lightroom Color Grading for Beginners
Beginners should start with subtle changes instead of attempting complex cinematic grades immediately. Learn what shadows, midtones, highlights, hue, saturation, luminance, blending, and balance do before combining multiple techniques.
Choose one reference photograph and experiment with small adjustments. Compare the original and edited versions frequently. With practice, you will begin to understand how specific colors influence mood and how different tonal ranges interact within the photograph.
Advanced Lightroom Color Grading Techniques
Advanced editors can combine color grading with masks, curves, HSL adjustments, texture, clarity, dehaze, and selective color corrections. Masks are particularly valuable because they allow color adjustments to target subjects or environmental areas independently.
For example, a photographer can warm a person’s face while keeping the surrounding environment cooler. Another approach is to create a cool background while preserving natural skin color through selective masking. These localized adjustments provide considerably more control than global color grading alone.
How to Know When Your Color Grade Is Finished
A color grade is finished when it supports the photograph without distracting from the subject. If viewers notice the color treatment before noticing the story, composition, or subject, the adjustment may be too strong.
Compare the edited image with the original and temporarily reduce the grading intensity. If the photograph loses atmosphere when the grade is removed, the treatment is probably contributing positively. If the image suddenly looks more natural and compelling, reduce the strength of the color grade.
Frequently Asked Questions
What is Lightroom Color Grading?
Lightroom Color Grading is an editing technique that allows photographers to apply specific colors to shadows, midtones, and highlights. It helps control mood, atmosphere, contrast, and visual style while preserving detailed control over different tonal ranges.
Is Lightroom Color Grading difficult to learn?
Lightroom Color Grading is relatively easy to learn once the basic concepts of hue, saturation, luminance, blending, and balance are understood. Beginners can start with subtle adjustments and gradually develop more advanced color-grading techniques.
What is the best color for Lightroom shadows?
There is no single best shadow color. Blue, teal, green, purple, and neutral tones can all work effectively depending on the image. Cool colors are commonly used for cinematic and moody photographs, while warmer shadows can create nostalgic or earthy appearances.
Should I color grade before adjusting exposure?
Technical corrections should generally come first. Correct exposure, white balance, contrast, highlights, and shadows before applying creative color grading. This provides a stable foundation and makes color decisions more predictable.
Can Lightroom Color Grading improve portraits?
Yes. Subtle color grading can enhance portrait mood and create separation between skin, clothing, and background. Warm highlights and carefully controlled shadows are common approaches, but skin tones should always remain natural.
Can I create cinematic colors in Lightroom?
Yes. Cinematic color treatments can be created by combining cool shadows, warm highlights, controlled saturation, suitable contrast, and balanced tonal transitions. The strongest cinematic effects usually rely on subtle rather than extreme color differences.
What is the difference between HSL and Color Grading?
HSL primarily modifies individual color families, while Color Grading targets colors according to tonal ranges such as shadows, midtones, and highlights. Both tools can be combined for precise and professional color control.
Should Lightroom Color Grading be highly saturated?
Usually, no. Excessive saturation can make photographs look artificial and reduce color harmony. Professional color grades often use moderate or subtle saturation so the final image maintains a polished appearance.
Can Lightroom Color Grading presets be used on multiple photos?
Yes. Presets can save color-grading settings and apply them across multiple photographs. However, each image should be individually checked because exposure, white balance, lighting, and subject colors can vary considerably.
What is the most important Lightroom Color Grading tip?
The most important tip is to make intentional, controlled adjustments. Start with a technically balanced photograph, choose colors that support the subject and mood, keep saturation restrained, and repeatedly compare the final result with the original image.
Conclusion
Lightroom color grading provides photographers with precise control over the emotional and visual character of their photographs. By separating shadows, midtones, highlights, and global color influence, Lightroom makes sophisticated color manipulation accessible to both beginners and experienced editors.
The strongest results come from restraint, consistency, and a clear understanding of color relationships. Correct technical problems first, establish a balanced tonal foundation, then introduce creative colors gradually.
