

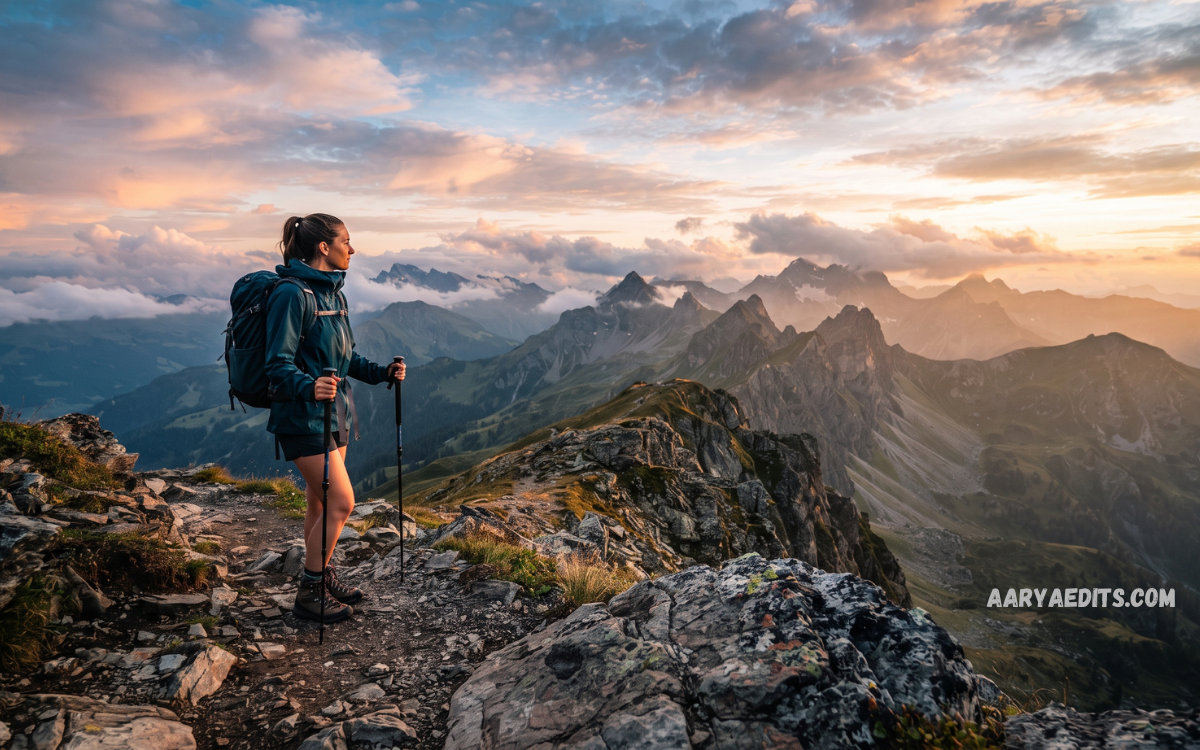
The Lightroom DSLR Effect is a popular photo-editing style designed to give ordinary photographs the polished appearance associated with professional DSLR cameras. With the right Lightroom adjustments, photographers can improve sharpness, contrast, colors, highlights, shadows, and overall depth without making an image look heavily edited.
A DSLR-style appearance is not created through one single Lightroom setting. It comes from combining exposure correction, white balance, tonal control, color grading, texture, clarity, sharpening, and selective adjustments. Understanding how these elements work together allows you to create professional-looking photographs while preserving natural skin tones and realistic details.
What Is the Lightroom DSLR Effect?
The Lightroom DSLR Effect refers to a photo-editing approach that makes images appear as though they were captured with a professional DSLR camera and high-quality lens. The style generally emphasizes detail, dynamic range, controlled contrast, accurate colors, subject separation, and a pleasing background appearance.
Modern smartphone cameras can capture excellent photographs, but their processing can sometimes create excessive sharpening, strong HDR effects, or artificial colors. Lightroom provides greater control over the final appearance, allowing users to recreate many characteristics associated with DSLR photography through carefully balanced editing.
Why Use a Lightroom DSLR Effect?
A DSLR-style Lightroom edit can transform a flat or ordinary photograph into a more refined image. It can improve visual depth, enhance important details, correct distracting colors, and create a stronger relationship between the subject and background.
This effect works particularly well for portraits, fashion photography, wedding photographs, travel images, street photography, product photography, and outdoor shoots. The key is moderation because excessive clarity, saturation, or sharpening can quickly make an image appear artificial.
Lightroom DSLR Effect Settings
The basic Lightroom DSLR Effect settings usually begin with exposure, contrast, highlights, shadows, whites, and blacks. These controls establish the overall dynamic range before more advanced color and detail adjustments are applied.
A useful starting point can include a modest increase in contrast, reduced highlights, raised shadows, slightly adjusted whites, and controlled blacks. Exact values should depend on the original photograph because lighting conditions, camera exposure, subject colors, and lens characteristics vary considerably.
Exposure Adjustment for a DSLR Look
Exposure is one of the most important adjustments when creating a professional DSLR-style photograph. An image that is too dark can lose important facial details, while excessive brightness can remove texture from skies, clothing, and bright backgrounds.
Use the Exposure slider to establish a balanced overall brightness. After correcting exposure, examine the Highlights and Shadows sliders separately so that bright areas retain detail while darker regions remain visible without creating an artificial HDR appearance.
Contrast for Professional Depth
Contrast gives photographs visual structure and helps separate different tonal regions. A professional DSLR image often has controlled contrast rather than extreme contrast, allowing shadows to remain rich while highlights maintain detail.
Increase Contrast gradually and observe the subject’s skin, clothing, and background. For a softer portrait, a small contrast adjustment may be preferable, while landscapes and architectural photographs can often tolerate stronger tonal separation.
Highlights and Shadows
The Highlights slider is useful for recovering detail from bright portions of a photograph. Lowering highlights can bring back information in skies, windows, bright clothing, and reflective surfaces that appear overexposed.
Shadows work in the opposite direction by controlling darker areas. Raising Shadows can reveal facial details and background information, but excessive shadow recovery may produce a flat appearance. The ideal DSLR Effect maintains visible detail while preserving natural depth.
Whites and Blacks
Whites and Blacks provide additional control over the brightest and darkest tonal points. These settings can make an image appear more dynamic without relying heavily on global contrast.
Increase Whites carefully until bright areas have sufficient presence, then adjust Blacks to establish stronger depth. A small reduction in Blacks can create a richer appearance, while raising Blacks can produce a softer editorial style.
White Balance for Natural Colors
White Balance has a major influence on the Lightroom DSLR Effect because professional-looking photographs usually depend on believable color temperature. Incorrect white balance can make skin appear too orange, blue, green, or pale.
Use the Temperature and Tint controls to neutralize unwanted color casts before creating a creative color grade. For portraits, natural skin tones should remain the priority. Creative warmth or coolness can be introduced after the basic white balance has been corrected.
Color Temperature and DSLR Style
Warm tones can make portraits and lifestyle photographs feel inviting, while cooler tones can create a clean, modern, or cinematic atmosphere. Lightroom makes it possible to control this mood without completely changing the original photograph.
For a classic DSLR appearance, avoid excessive warmth or coolness. A subtle temperature adjustment combined with balanced contrast often creates a more convincing result than an extreme color shift.
Vibrance Versus Saturation
Vibrance and Saturation may appear similar, but they influence color differently. Saturation generally increases or decreases the intensity of colors across the photograph, while Vibrance provides a more selective approach to enhancing less-saturated colors.
For the Lightroom DSLR Effect, Vibrance is often safer for maintaining natural portraits. Strong Saturation can quickly make skin tones look unnatural, especially when the original photograph already contains warm colors.
HSL Adjustments for DSLR Colors
The HSL panel provides individual control over Hue, Saturation, and Luminance for different color ranges. This makes it particularly useful when creating professional color palettes.
You can modify greens, blues, oranges, yellows, and reds independently to achieve a refined appearance. In portrait photography, Orange and Red controls deserve special attention because they strongly influence skin tones.
Creating Natural Skin Tones
Natural skin tones are essential for a convincing DSLR Effect. Excessive orange saturation, strong red tones, or unrealistic luminance can make portraits look processed even when the rest of the image appears professional.
Use the Orange channel carefully and inspect the subject’s face at different zoom levels. Small changes to Hue, Saturation, and Luminance can improve skin appearance while maintaining realistic texture and dimensionality.
Read Also: Lightroom HD Photo Editing: Professional Tips & Techniques
Texture and Clarity
Texture and Clarity influence the perception of detail. Texture can enhance fine details such as hair, fabric, skin texture, and small environmental elements without affecting the entire image as aggressively as Clarity.
Clarity creates stronger midtone contrast and can add visual impact, but excessive use may create harsh skin and exaggerated edges. For portraits, moderate Texture with restrained Clarity generally produces a more professional result.
Dehaze for Added Definition
Dehaze is useful when an image looks slightly hazy or lacks atmospheric definition. A small adjustment can improve separation between foreground and background and make landscapes appear more dimensional.
However, Dehaze should not be treated as a universal sharpness tool. Excessive Dehaze can increase contrast dramatically, create unnatural colors, and make skin appear rough. Use it selectively according to the photograph.
Sharpening for DSLR Detail
Sharpening helps emphasize important image details after exposure and color corrections are complete. Lightroom provides Amount, Radius, Detail, and Masking controls for more precise sharpening.
Masking is especially valuable for portraits because it allows sharpening to focus more heavily on edges rather than applying excessive sharpening across smooth skin. A professional DSLR Effect should look detailed without producing obvious halos or crunchy textures.
Noise Reduction
High-ISO photographs often contain digital noise, particularly in low-light environments. Lightroom’s Noise Reduction controls can help smooth unwanted luminance and color noise.
Noise reduction should be balanced against detail preservation. Excessive noise reduction can make photographs look plastic or artificially smooth. Apply enough reduction to clean distracting noise while retaining meaningful texture.
Lens Corrections
Lens Corrections can improve the technical quality of an image by addressing optical characteristics such as distortion, chromatic aberration, and vignetting. These corrections are particularly useful when photographs are captured with wide-angle lenses.
Enable profile corrections when Lightroom recognizes the camera and lens combination. Correcting optical issues before applying creative adjustments can provide a cleaner foundation for the final DSLR-style edit.
Transform and Perspective Correction
Perspective can significantly influence how professional a photograph looks. Buildings, interiors, architecture, and wide-angle portraits may contain unwanted distortion that becomes noticeable after editing.
Lightroom’s Transform tools can correct vertical and horizontal perspective problems. Use these adjustments carefully because excessive correction can stretch subjects or remove important parts of the composition.
Vignette for Subject Focus
A subtle vignette can guide attention toward the center of an image and strengthen the relationship between the subject and background. It can also create a more cinematic or portrait-oriented appearance.
For a professional Lightroom DSLR Effect, keep the vignette subtle. Heavy darkening around the edges can look dated and artificial, while a restrained vignette can naturally reinforce visual focus.
Creating DSLR Background Depth
One of the most recognizable characteristics associated with DSLR photography is subject separation. A wide-aperture lens can produce shallow depth of field, making the subject appear sharp while the background becomes beautifully blurred.
Lightroom cannot recreate genuine optical depth of field perfectly because the original photograph determines the available information. However, masking tools can help simulate background separation by selectively reducing clarity, texture, sharpness, and contrast in background areas.
Using Lightroom Masking
Masking is one of the most powerful tools for creating an advanced DSLR Effect. Instead of applying identical adjustments to the entire photograph, masking allows you to target the subject, sky, background, face, clothing, or other selected areas.
A Subject mask can be used to improve exposure, texture, sharpness, or color on the main subject. A Background mask can receive softer adjustments, helping create visual separation without making the photograph appear artificially blurred.
Portrait DSLR Effect in Lightroom
Portrait photography benefits greatly from controlled contrast, natural skin tones, detailed eyes, soft backgrounds, and balanced highlights. Start by correcting exposure and white balance before making creative changes.
Apply moderate Texture and selective sharpening to important facial features while avoiding excessive clarity on skin. Use masking to brighten the subject slightly or soften the background, creating a polished portrait that maintains realistic dimensionality.
Wedding Photography DSLR Effect
Wedding photographs often benefit from warm highlights, clean skin tones, controlled whites, and gentle contrast. Because wedding dresses and bright environments contain significant highlight information, highlight recovery can be particularly important.
A refined wedding DSLR Effect should maintain emotional warmth without making colors excessively yellow or orange. Consistency is also essential, especially when editing a large collection of photographs from the same event.
Landscape DSLR Effect
Landscape images can benefit from stronger detail, controlled highlights, rich greens, deep skies, and carefully managed contrast. Begin by correcting exposure and recovering highlight information from bright skies.
Use Vibrance and HSL adjustments to improve natural colors without creating an unrealistic appearance. Texture and Dehaze can add definition, while masking can help enhance the sky or foreground independently.
Street Photography DSLR Effect
Street photography often works well with moderate contrast and carefully controlled color grading. The goal is to emphasize atmosphere, people, architecture, movement, and environmental details without overwhelming the composition.
A slightly muted color palette can produce an editorial appearance, while stronger blacks can create a dramatic documentary style. Experiment with the Tone Curve and Color Grading panels to develop a consistent visual identity.
Cinematic DSLR Effect
A cinematic DSLR Effect typically combines controlled highlights, deeper shadows, muted colors, and carefully selected warm and cool tones. The style is useful for portraits, travel photography, storytelling images, and social media content.
Color Grading allows photographers to introduce different tones into shadows, midtones, and highlights. A subtle warm highlight with a slightly cooler shadow can create separation, but extreme color grading should be avoided when realism is important.
Tone Curve for Professional Editing
The Tone Curve provides more precise tonal control than the standard Contrast slider. A subtle S-curve can increase contrast by slightly lowering darker tones and raising brighter tones.
The strength of the curve should match the photograph. A portrait may benefit from a gentle curve, while a dramatic landscape can support stronger tonal separation. Always inspect skin tones and shadow detail after applying the curve.
Color Grading Techniques
Color Grading allows photographers to control the appearance of Shadows, Midtones, and Highlights independently. This makes it possible to create sophisticated color relationships while maintaining the original photograph’s character.
For a natural DSLR Effect, use low-intensity color grading. Warm highlights can add depth to portraits, while subtle cooler shadows can increase dimensionality. The objective is a cohesive palette rather than obvious color manipulation.
Lightroom DSLR Effect for Mobile Photos
Smartphone photographs can also benefit from DSLR-style Lightroom editing. Modern phones capture substantial detail, but computational photography can produce strong HDR processing, artificial sharpening, and unusual color rendering.
Start with a neutral edit and reduce excessive highlights or clarity if necessary. Use Texture, Contrast, HSL, Masking, and selective sharpening to create a more controlled image while preserving the strengths of the original smartphone photograph.
DSLR Effect for Instagram Photos
Instagram photography often benefits from consistent editing across an entire feed. A recognizable Lightroom DSLR Effect can help create a professional visual identity and make photographs appear more cohesive.
Avoid relying on extreme presets that change every photograph identically. Different lighting conditions require different exposure and white balance corrections. A strong workflow uses a consistent color foundation while allowing individual photographs to receive customized adjustments.
Lightroom Presets for DSLR Effects
A Lightroom preset can save time by storing a collection of editing adjustments. Presets are useful when processing multiple photographs with similar lighting and camera characteristics.
However, presets should be treated as starting points rather than automatic solutions. After applying a DSLR-style preset, review exposure, white balance, highlights, shadows, skin tones, and saturation. Small corrections can make the difference between a generic preset appearance and a professional final image.
How to Create Your Own DSLR Preset
Begin by editing one well-exposed photograph until the colors, contrast, detail, and overall mood look consistent with your desired style. Avoid making adjustments that depend heavily on one specific photograph’s exposure.
Once the visual style is established, save appropriate Lightroom settings as a preset. Exclude settings that should change from photograph to photograph, such as Exposure, Crop, and White Balance, unless the preset is intended for a very specific shooting environment.
Common Lightroom DSLR Effect Mistakes
One common mistake is using excessive Clarity, Texture, and Sharpening at the same time. These settings can create harsh edges and unnatural skin while making photographs appear overprocessed.
Another mistake is excessive Saturation. Professional color editing usually relies on controlled color relationships rather than simply increasing every color. Maintaining realistic skin tones, natural greens, balanced blues, and restrained highlights generally creates a more sophisticated result.
How to Keep the Effect Natural
The best DSLR Effect often looks subtle rather than obviously edited. Viewers should notice the quality, depth, color, and detail of the photograph rather than the editing itself.
After completing an edit, temporarily reduce the strongest adjustments and compare the result with the original. If the photograph still looks improved after reducing intensity, the editing direction is probably working effectively.
Lightroom DSLR Effect Workflow
A professional workflow should follow a logical sequence. Start with profile selection, exposure, white balance, highlights, shadows, whites, and blacks before moving into contrast and color.
Next, refine HSL, Tone Curve, Color Grading, Texture, Clarity, Sharpening, Noise Reduction, and Masking. Finish by checking the entire photograph at both full-screen and zoomed views to identify artifacts or unnatural adjustments.
DSLR Effect Versus Camera Quality
Lightroom can significantly improve a photograph, but editing cannot completely replace optical characteristics created during capture. Lens quality, sensor size, aperture, focal length, lighting, and shooting technique all influence the final appearance.
A DSLR-style edit works best when the original photograph has good exposure, focus, composition, and lighting. Lightroom should enhance the photograph’s existing strengths rather than attempt to compensate for every technical limitation.
Best Lightroom DSLR Effect Settings
There is no universal set of Lightroom settings that works perfectly for every photograph. Different cameras, lenses, lighting conditions, subjects, and creative goals require different adjustments.
As a general starting point, use moderate Contrast, slightly reduced Highlights, controlled Shadows, balanced Whites and Blacks, restrained Vibrance, modest Texture, subtle Clarity, and appropriate Sharpening. Adjust every value while observing the image rather than copying fixed numbers blindly.
Professional Tips for Lightroom DSLR Editing
Always edit from a high-quality original file whenever possible. RAW files provide significantly greater flexibility for recovering highlights, adjusting shadows, correcting white balance, and refining colors.
Use a calibrated or reasonably accurate display when color accuracy matters. Zoom out regularly while editing because excessive attention to small details can cause you to overlook the overall composition, tonal balance, and visual hierarchy.
How to Make Photos Look Expensive in Lightroom
A premium photographic appearance usually comes from consistency, controlled contrast, accurate colors, clean details, and intentional composition. Expensive-looking photographs rarely depend on extreme editing.
Focus on creating separation between the subject and background, maintaining clean highlights, protecting skin tones, and developing a sophisticated color palette. Small adjustments applied with precision can produce a stronger result than dramatic changes.
Lightroom DSLR Effect for Professional Photographers
Professional photographers can use a DSLR Effect workflow as part of a larger color-management and post-production process. The effect can become a recognizable editing signature when applied consistently across a portfolio.
Developing a personal style requires experimentation with profiles, curves, HSL adjustments, color grading, masking, and detail controls. Over time, photographers can create custom presets that accelerate their workflow while retaining the ability to make image-specific corrections.
Frequently Asked Questions
What Is the Lightroom DSLR Effect?
The Lightroom DSLR Effect is an editing style that gives photographs a polished appearance associated with professional DSLR cameras. It commonly uses controlled contrast, natural colors, improved detail, selective sharpening, and subject-background separation.
Can Lightroom Make Phone Photos Look Like DSLR Photos?
Lightroom can make smartphone photographs look more refined and DSLR-inspired, particularly when the original image contains good exposure and detail. However, Lightroom cannot fully reproduce the optical characteristics of a DSLR lens or larger camera sensor.
Which Lightroom Settings Create a DSLR Look?
Exposure, Contrast, Highlights, Shadows, Whites, Blacks, Texture, Clarity, Sharpening, HSL, Tone Curve, and Color Grading all contribute to a DSLR-style appearance. The correct combination depends on the photograph and desired visual style.
Is Lightroom DSLR Effect Good for Portraits?
Yes. The effect works particularly well for portraits when skin tones remain natural and sharpening is controlled. Masking can also improve subject separation and create a softer background appearance.
Should I Increase Clarity for a DSLR Effect?
Clarity can improve midtone definition, but excessive Clarity can make portraits look harsh. Use it carefully and consider Texture as a more subtle alternative for enhancing fine detail.
Can I Create a DSLR Preset in Lightroom?
Yes. After creating your preferred editing style, you can save suitable adjustments as a custom preset. Review exposure and white balance separately because these settings often vary between photographs.
Does Lightroom Improve Image Quality?
Lightroom can improve perceived image quality through exposure correction, noise reduction, sharpening, color adjustment, lens correction, and tonal control. It cannot recover detail that was never captured by the camera.
What Is the Best DSLR Effect for Instagram?
A clean, natural, contrast-balanced style generally works well for Instagram. Consistency across photographs is more important than using extreme colors or heavy effects.
How Do I Get Blurry Backgrounds in Lightroom?
Use Lightroom Masking to select the background and reduce Texture, Clarity, Sharpness, and sometimes Contrast. This can simulate some background separation, although genuine optical bokeh remains dependent on the original camera capture.
Should I Use a Lightroom Preset?
Presets can speed up editing and help maintain consistency. They work best as starting points that are customized for exposure, white balance, lighting, skin tones, and individual image characteristics.
Cocnlusion
The Lightroom DSLR Effect is an effective way to create polished, professional-looking photographs through careful post-processing. The strongest results come from combining balanced exposure, controlled contrast, natural color, precise detail enhancement, selective masking, and thoughtful color grading.
Rather than searching for one perfect setting, develop a repeatable editing workflow that adapts to each photograph. Start with technical corrections, refine tonal balance, improve colors, enhance important details, and finish with selective adjustments.
