

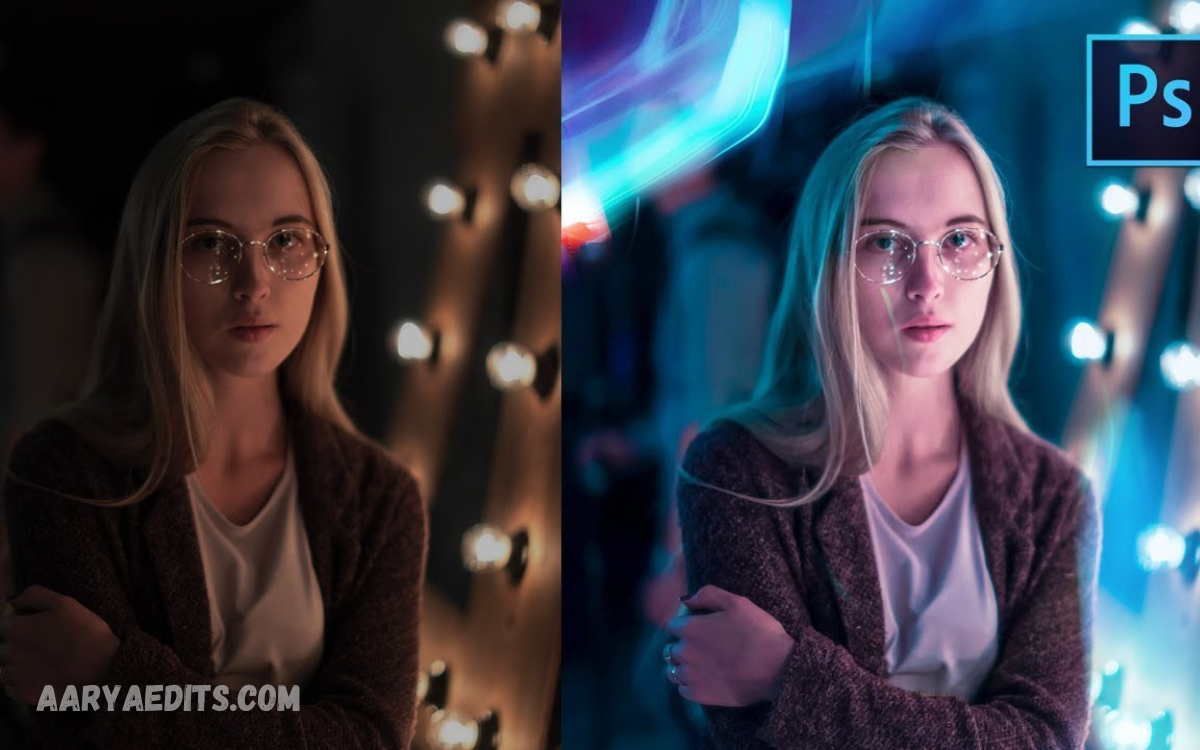
Professional photo editing is an essential skill for photographers, graphic designers, content creators, and social media enthusiasts who want to produce high-quality, visually appealing images. With the right editing techniques, you can transform ordinary photos into stunning masterpieces by enhancing colors, improving lighting, removing unwanted objects, and creating a polished, professional look.
You will learn the complete editing workflow, from basic adjustments like cropping, exposure correction, brightness, contrast, and color balance to advanced techniques such as skin retouching, background removal, object replacement, frequency separation, masking, and color grading.
Why Professional Photo Editing Matters?
Photo editing is much more than applying filters or increasing brightness. Professional editing enhances the overall appearance of an image while preserving its natural beauty. It helps eliminate distractions, improve composition, and highlight the subject effectively.
Some of the biggest advantages include:
- Produces visually appealing images.
- Enhances colors and lighting naturally.
- Removes unwanted objects and imperfections.
- Creates a consistent editing style.
- Improves engagement on websites and social media.
- Builds trust for businesses and brands.
- Increases the commercial value of photographs.
Professional editing transforms ordinary photos into high-quality visuals suitable for advertising, portfolios, websites, magazines, and digital marketing campaigns.
Essential Software for Professional Photo Editing
Choosing the right editing software is the first step toward professional-quality results.
Adobe Photoshop
Adobe Photoshop remains the industry’s leading photo editing software. It provides advanced tools for retouching, compositing, masking, object removal, and creative manipulation.
Best for:
- Portrait retouching
- Background removal
- Graphic design
- Composite editing
- Advanced image manipulation
Adobe Lightroom
Lightroom is ideal for photographers who need fast and efficient editing.
Its features include:
- RAW image processing
- Exposure correction
- Color grading
- Batch editing
- Noise reduction
- Lens correction
Lightroom is widely used by wedding photographers, travel photographers, and professional content creators.
AI Photo Editing Software
Modern AI editing tools save hours of manual work.
Popular AI features include:
- Automatic background removal
- AI skin retouching
- Object removal
- Image enhancement
- AI upscaling
- Noise reduction
These tools significantly improve workflow efficiency while maintaining high-quality results.
Step 1: Import Your Images
Start by importing your RAW or high-resolution images into your editing software.
Professional photographers usually shoot in RAW format because it contains more image information, allowing greater flexibility during editing.
Organize images into folders based on:
- Events
- Projects
- Clients
- Dates
- Categories
Proper organization makes future editing much easier.
Step 2: Crop and Straighten the Image
Cropping improves composition and removes unnecessary distractions.
Follow these tips:
- Use the Rule of Thirds.
- Straighten the horizon.
- Remove empty space.
- Keep the subject centered when appropriate.
- Maintain the desired aspect ratio.
A properly cropped image instantly appears more professional.
Step 3: Adjust Exposure
Exposure is one of the most important adjustments.
Fine-tune:
- Brightness
- Highlights
- Shadows
- Whites
- Blacks
Avoid overexposed or underexposed areas while maintaining natural lighting.
Professional editors focus on preserving details in both bright and dark areas.
Step 4: Correct White Balance
White balance determines the overall color temperature of an image.
Incorrect white balance can make photos appear:
- Too blue
- Too orange
- Too yellow
- Too green
Adjust the temperature and tint sliders until colors appear realistic.
Natural skin tones are especially important in portrait photography.
Step 5: Enhance Colors
Color correction brings life to an image.
Professional editors adjust:
- Vibrance
- Saturation
- Hue
- Color Mixer
- HSL Panel
Increase vibrance carefully rather than oversaturating colors.
The goal is to create rich yet realistic-looking images.
Step 6: Improve Contrast
Contrast adds depth and dimension.
Use:
- Curves
- Levels
- Tone Curve
- Contrast slider
Balanced contrast creates images with a stronger visual impact while preserving shadow details.
Read Also: Luxury AI Image Prompt: The Professional Guide to Creating Premium AI-Generated Visuals
Step 7: Sharpen Details
Sharpening improves clarity.
Increase:
- Texture
- Clarity
- Sharpness
Avoid excessive sharpening, which can create unwanted halos and noise.
Professional editing emphasizes natural detail.
Step 8: Reduce Noise
Images captured in low light often contain digital noise.
Use noise reduction carefully.
Balance between:
- Detail preservation
- Noise removal
Overusing noise reduction may produce a plastic appearance.
Step 9: Retouch Portraits
Portrait editing requires precision.
Common retouching includes:
- Remove acne
- Eliminate blemishes
- Reduce wrinkles
- Whiten teeth
- Brighten eyes
- Smooth skin naturally
Professional retouching enhances appearance without making subjects look artificial.
Step 10: Remove Unwanted Objects
Distractions reduce image quality.
Photoshop offers tools like:
- Clone Stamp
- Healing Brush
- Spot Healing Brush
- Content-Aware Fill
These tools allow seamless removal of unwanted objects while preserving image quality.
Step 11: Background Editing
Background editing helps direct attention toward the subject.
Professional techniques include:
- Background blur
- Background replacement
- Background cleanup
- Sky replacement
Clean backgrounds produce stronger compositions.
Step 12: Color Grading
Color grading gives images a unique style.
Popular styles include:
- Cinematic
- Warm tones
- Cool tones
- Vintage
- Matte
- Moody
- Bright and airy
Maintain consistency throughout your portfolio by using a similar grading style.
Step 13: Use Layers and Masks
Layers are one of Photoshop’s greatest strengths.
Benefits include:
- Non-destructive editing
- Easy adjustments
- Better organization
- Flexible corrections
Masks allow precise editing without permanently changing the original image.
Professional editors rely heavily on layer masks for advanced workflows.
Step 14: Dodge and Burn
Dodging brightens areas.
Burning darkens selected regions.
These techniques help:
- Sculpt faces
- Add depth
- Improve lighting
- Increase realism
Subtle adjustments create dramatic improvements.
Step 15: Add Final Touches
Before exporting, review the image carefully.
Check:
- Skin tones
- Sharpness
- Noise
- Dust spots
- Color consistency
- Cropping
- Overall balance
Zoom in to inspect fine details before finalizing.
Export Settings
Different platforms require different export settings.
For websites:
- JPEG format
- sRGB color profile
- Optimized file size
- High quality
For printing:
- TIFF format
- Adobe RGB
- 300 DPI
For social media:
- JPEG
- Proper aspect ratio
- Optimized dimensions
Correct export settings preserve image quality.
Common Photo Editing Mistakes
Avoid these common mistakes:
- Oversaturated colors
- Excessive skin smoothing
- Over-sharpening
- Unrealistic HDR effects
- Poor white balance
- Crooked horizons
- Heavy filters
- Excessive contrast
Professional editing focuses on subtle improvements rather than obvious manipulation.
Tips for Faster Editing
Improve efficiency by:
- Creating presets
- Using keyboard shortcuts
- Organizing layers
- Batch editing similar images
- Working with RAW files
- Calibrating your monitor
- Backing up projects regularly
A streamlined workflow saves time while maintaining consistent quality.
AI in Professional Photo Editing
Artificial Intelligence is transforming photo editing.
Modern AI tools can:
- Remove backgrounds instantly
- Replace skies
- Enhance image resolution
- Remove objects
- Improve portraits
- Reduce noise automatically
- Generate realistic edits
While AI speeds up editing, professional knowledge remains essential for achieving polished, natural-looking results.
Best Practices for Professional Results
Successful photo editors follow a consistent workflow.
Remember to:
- Shoot in RAW whenever possible.
- Keep edits natural.
- Maintain consistent colors.
- Preserve image details.
- Use non-destructive editing.
- Save layered project files.
- Continuously learn new techniques.
- Practice regularly.
Professional editing is about enhancing reality rather than completely changing it.
Frequently Asked Questions
What is the difference between Photoshop and Lightroom?
Lightroom is primarily designed for organizing, batch editing, and enhancing RAW photos, while Photoshop is intended for detailed retouching, image manipulation, graphic design, and complex editing projects.
Why should photographers shoot in RAW format?
RAW files contain more image data than JPEG files, allowing greater flexibility when adjusting exposure, shadows, highlights, white balance, and colors without losing image quality.
How long does it take to become a professional photo editor?
The learning timeline depends on practice and experience. Most beginners develop solid editing skills within a few months of consistent learning, while mastering advanced techniques may take one to two years.
What are the most important photo editing techniques?
Essential techniques include cropping, exposure correction, white balance adjustment, color correction, sharpening, noise reduction, skin retouching, object removal, and color grading.
Is AI useful for professional photo editing?
Yes. AI-powered tools can automate tasks such as background removal, object removal, image enhancement, noise reduction, and portrait retouching, speeding up the editing process while maintaining excellent quality.
How can I improve my photo editing skills?
Practice regularly, edit different types of images, study professional workflows, learn keyboard shortcuts, experiment with editing styles, and keep up with the latest editing tools and techniques.
What are the common mistakes to avoid in photo editing?
Common mistakes include oversaturating colors, over-smoothing skin, excessive sharpening, poor white balance, unrealistic HDR effects, heavy filters, and over-editing, which can make photos look unnatural.
Conclusion
Mastering a Professional Photo Editing Tutorial requires patience, creativity, and continuous practice. Every professional photographer and designer develops their own editing style over time, but the core principles remain the same: correct exposure, balanced colors, careful retouching, thoughtful composition, and subtle enhancements.
Whether you are editing portraits, landscapes, product images, wedding photographs, or social media content, following a structured workflow will help you achieve consistent, high-quality results.
