

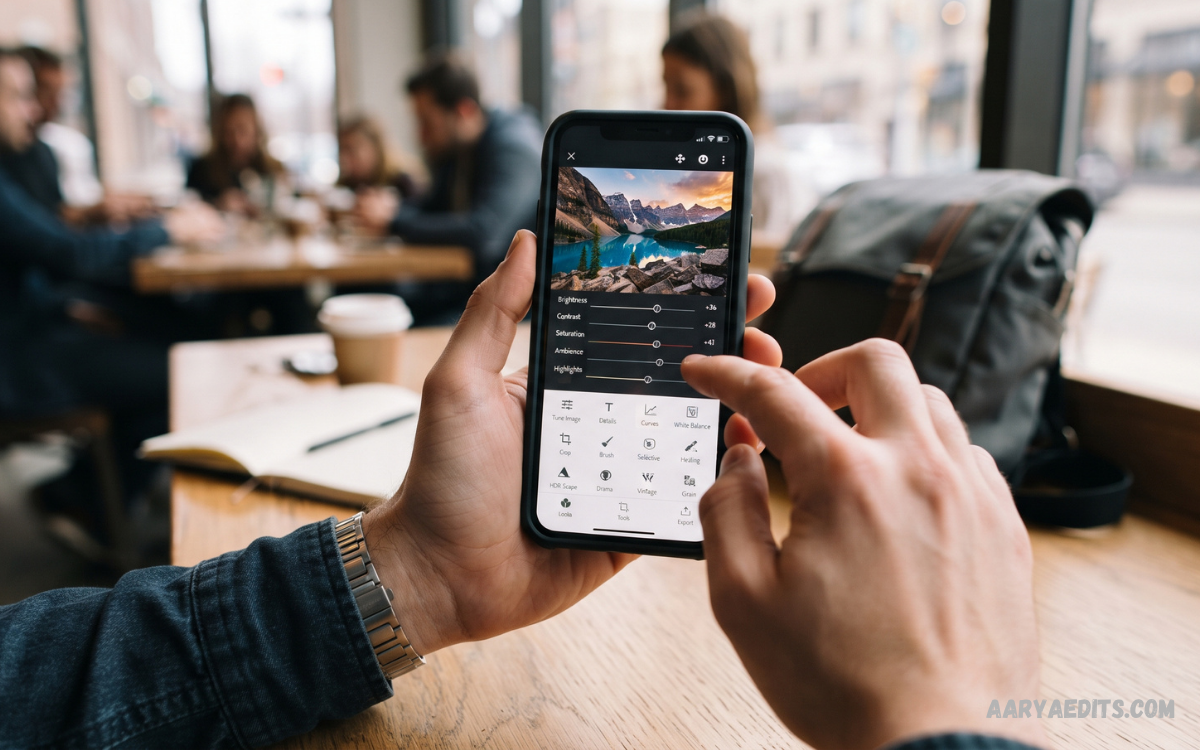
A professional Snapseed photo edit can transform an ordinary image into a polished, attractive photograph without requiring expensive desktop software. Snapseed provides powerful editing tools for exposure, color, detail, perspective, portraits, backgrounds, and creative effects.
This complete guide explains how to use Snapseed effectively, from basic adjustments to advanced editing techniques. Whether editing social media photos, portraits, travel images, product pictures, or everyday photography, Snapseed offers practical controls for creating clean and professional results.
What Is Snapseed Photo Edit?
Snapseed photo edit refers to the process of improving photographs through Snapseed’s collection of professional editing tools. The app provides controls for brightness, contrast, saturation, ambience, highlights, shadows, structure, sharpening, curves, white balance, cropping, and perspective.
Snapseed also supports selective editing and local adjustments, allowing users to improve specific areas instead of changing the entire photograph. This flexibility makes Snapseed useful for beginners and experienced mobile photographers who want precise results from a smartphone.
Why Use Snapseed for Photo Editing?
Snapseed combines simple controls with advanced editing features inside a mobile-friendly interface. Users can quickly correct lighting, improve colors, enhance details, crop compositions, remove distractions, and create different visual styles without complicated editing software.
Another major advantage involves control over individual adjustments. Instead of applying one filter across an entire photograph, users can manually control important settings and create a more natural result. This approach helps maintain realistic skin tones, balanced highlights, and accurate colors.
Snapseed Photo Edit Basic Workflow
A successful Snapseed photo edit usually begins with a high-quality original image. Open the photograph, inspect lighting and composition, then start with basic corrections before applying creative effects. This workflow prevents excessive editing and keeps the final image balanced.
Start with Tune Image for overall improvements. Adjust brightness, contrast, saturation, ambience, highlights, and shadows according to the photograph. Make small changes rather than pushing every setting aggressively, because subtle adjustments generally produce cleaner professional results.
How to Adjust Brightness in Snapseed
Brightness controls the overall light level of an image. A dark photograph can benefit from a moderate brightness increase, while an overexposed image may require a reduction. The goal should remain balanced lighting rather than maximum brightness.
During a Snapseed photo edit, examine both bright and dark areas after changing brightness. If highlights become too bright or important details disappear from shadows, reduce the adjustment and use Highlights or Shadows separately for greater control.
How to Improve Contrast
Contrast defines the difference between lighter and darker parts of a photograph. Increasing contrast can make an image appear stronger and more dramatic, while reducing contrast creates a softer appearance with less separation between tones.
Professional editing requires controlled contrast. Excessive contrast can remove shadow detail and create harsh highlights. For portraits and lifestyle photographs, moderate contrast often provides a cleaner appearance while preserving important facial and background details.
Snapseed Photo Edit Using Saturation
Saturation controls color intensity throughout the image. Increasing saturation can make dull colors more noticeable, while reducing saturation creates a softer or muted appearance. Saturation should match the subject and intended visual style.
For professional results, avoid excessive saturation. Strongly saturated colors can appear unnatural and distract from the main subject. A balanced Snapseed photo edit normally keeps skin tones realistic while improving important colors such as sky, clothing, plants, or architectural details.
Using Ambience for Better Images
Ambience is useful for balancing overall tonal appearance while improving the relationship between shadows and highlights. It can help reveal detail in photographs that appear flat, dark, or unevenly exposed.
Use ambience carefully because strong adjustments may change the visual character of the photograph. Combine ambience with brightness, highlights, and shadows instead of relying on one setting to correct every lighting problem.
Snapseed Photo Edit With Highlights and Shadows
Highlights control brighter areas, while Shadows affect darker areas. These tools are particularly useful for photographs containing strong sunlight, bright windows, dark backgrounds, or uneven lighting.
Reducing highlights can recover visual detail in bright areas, while increasing shadows can reveal information hidden in darker sections. The best result usually comes from balancing both controls instead of dramatically changing only one tonal range.
White Balance Correction in Snapseed
White Balance helps correct unwanted color casts caused by lighting conditions. Indoor lighting may produce warm tones, while certain outdoor conditions can create cooler or unusual color appearances.
Use the temperature and tint controls to make colors look more natural. White Balance becomes especially important for portraits, food photography, product images, and photographs containing neutral objects that should appear white or gray.
Snapseed Photo Edit With Curves
Curves provide advanced control over image brightness and contrast. Users can adjust different tonal ranges by modifying points along the curve, making Curves one of the most flexible tools available for advanced editing.
A gentle S-curve can increase contrast by slightly darkening shadows and brightening highlights. More complex curve adjustments can create specialized looks, but beginners should make small changes and continuously compare the edited image with the original.
Using Details for Sharper Photos
The Details tool includes Structure and Sharpening controls designed to improve visible texture and edge definition. These adjustments can make photographs appear clearer, especially when the original image looks slightly soft.
Avoid excessive sharpening because strong settings can introduce unnatural edges and visible artifacts. For portraits, use detail adjustments carefully, while landscapes, architecture, and objects can often tolerate slightly stronger structure and sharpening.
Snapseed Photo Edit for Portraits
Portrait editing requires a careful balance between detail, color, exposure, and skin appearance. Snapseed provides tools that can improve facial lighting, overall color, focus, and selected areas without requiring complicated desktop software.
Start by correcting exposure and white balance before making creative changes. Use Portrait, Selective, or Brush tools where appropriate, keeping skin tones natural. Professional portrait editing should enhance the photograph without making facial features appear artificial.
Snapseed Photo Edit Using the Portrait Tool
The Portrait tool can help emphasize facial subjects by providing controls designed specifically for portrait photographs. It can improve aspects such as facial lighting and overall portrait appearance.
Use portrait adjustments moderately and review the complete image after editing. The subject should remain visually consistent with the background, and facial tones should not become excessively bright or saturated compared with surrounding areas.
Selective Editing in Snapseed
Selective editing allows adjustments to specific areas of an image. This feature can be useful when one part of a photograph requires more brightness, contrast, saturation, or structure than the rest of the image.
For example, a user can brighten a face while keeping the background unchanged or enhance the color of a subject without affecting nearby objects. Selective editing provides greater precision and reduces the need for global adjustments.
Snapseed Photo Edit With Brush
The Brush tool provides another method for making local changes. Users can selectively modify exposure, temperature, saturation, or other supported properties in chosen areas of an image.
Brush editing works well for targeted corrections. Apply changes gradually and zoom into important areas when necessary. Careful brushwork can improve specific sections while maintaining the original character of the photograph.
Healing Tool for Removing Distractions
The Healing tool can remove certain unwanted elements from photographs by replacing selected areas with surrounding visual information. It can be useful for small distractions, marks, objects, or minor imperfections.
For better results, work on small areas rather than selecting large sections at once. Complex backgrounds may require several careful corrections. Always inspect the edited region afterward to ensure the replacement blends naturally with nearby details.
Snapseed Photo Edit With Crop and Rotate
Composition plays an important role in professional photography. The Crop tool can remove unnecessary areas and strengthen the visual focus, while Rotate and Straighten controls help correct tilted photographs.
Choose an aspect ratio based on the final purpose of the image. Social media posts, profile images, websites, and standard photographs may require different compositions. Avoid excessive cropping because it can reduce image quality and remove useful context.
Perspective Correction
Perspective correction can improve photographs containing buildings, architecture, signs, or other subjects affected by camera angle. Snapseed provides tools that help adjust horizontal and vertical perspective.
Use perspective adjustments carefully because major corrections can stretch or distort objects. After applying a correction, inspect straight lines, edges, and important subjects to confirm that the image still appears natural.
Snapseed Photo Edit for Social Media
Social media photographs often benefit from clear composition, balanced exposure, controlled color, and strong subject separation. Snapseed can help prepare photographs for different platforms by combining crop, Tune Image, Details, Selective, and creative tools.
Avoid applying identical settings to every photograph. Each image has different lighting and color characteristics. A consistent editing style can improve visual identity, but individual corrections should still match the original photograph.
Snapseed Photo Edit for Instagram-Style Images
For an Instagram-style photograph, begin with composition and lighting before adding a visual style. Crop the image appropriately, correct exposure, refine colors, and improve important details without making the image overly processed.
Creative tools such as Vintage, Drama, Grainy Film, or other effects can add character when used carefully. Apply effects with restraint and adjust their intensity so the photograph maintains clear details and a coherent visual appearance.
Read Also: Snapseed Beginner Tutorial: Complete Guide to Photo Editing
Snapseed Photo Edit for Product Photography
Product photographs require accurate color, clean backgrounds, balanced lighting, and strong detail. Snapseed can correct exposure and white balance while improving clarity and reducing minor distractions.
When editing products, prioritize color accuracy over dramatic effects. Excessive saturation or contrast can change the perceived appearance of the product. Use selective adjustments to improve the product while keeping the surrounding background visually controlled.
Snapseed Photo Edit for Travel Photography
Travel photographs often contain landscapes, buildings, people, skies, and changing lighting conditions. Snapseed can improve these images by balancing shadows, highlights, color, and detail while preserving the original atmosphere.
For landscapes, moderate Structure can emphasize textures such as mountains, roads, buildings, and natural surfaces. Saturation and ambience can improve color depth, but excessive adjustments may make skies and vegetation appear unrealistic.
Snapseed Photo Edit for Night Photography
Night photographs require careful control because dark areas can contain useful detail while bright lights can become overexposed. Start by adjusting exposure, shadows, highlights, and white balance.
Avoid increasing shadows too aggressively because this can reveal excessive noise. Instead, make gradual corrections and preserve the natural darkness of the scene. Controlled contrast can also help maintain a strong night-time atmosphere.
How to Create a Professional Snapseed Editing Style
A professional editing style begins with consistency. Choose a general approach for exposure, contrast, color intensity, and sharpness, then adapt those settings to each photograph rather than applying identical values everywhere.
Save or reuse suitable editing approaches when working with similar photographs. Snapseed’s workflow can help users maintain consistency across a collection while still allowing individual images to receive specific corrections.
Common Snapseed Photo Edit Mistakes
One common mistake involves excessive editing. Very high saturation, contrast, sharpening, or structure can make photographs look unnatural. Another issue occurs when users brighten shadows too much, creating a flat image with visible noise.
Another mistake involves editing without checking the original photograph. Always compare the final result with the starting image. The purpose of professional editing should be improvement, not simply adding more effects.
Snapseed Photo Edit Tips for Beginners
Beginners should learn the basic tools before experimenting with advanced effects. Start with Tune Image, Crop, Details, White Balance, Selective, and Healing, then gradually explore Curves, Perspective, Double Exposure, and creative filters.
Make one adjustment at a time and observe the result before moving to the next tool. Small corrections are easier to control and help users understand how each setting changes the photograph.
Advanced Snapseed Editing Workflow
An advanced workflow can begin with cropping and perspective correction, followed by exposure and white balance adjustments. After global corrections, use Curves for tonal refinement and Details for controlled sharpness.
The next stage can involve Selective, Brush, and Healing tools for local corrections. Finish with creative adjustments only when they support the intended style. Finally, inspect the image at full size and compare it with the original before exporting.
How to Export a Snapseed Photo Edit
After completing an edit, review the photograph carefully before saving. Check skin tones, bright areas, shadows, edges, colors, and small details. This final inspection can reveal problems that were not obvious during individual adjustments.
Choose the appropriate saving or exporting option based on the intended use. Keep an original copy of important photographs before applying major edits. Maintaining original files provides flexibility for future projects and different output requirements.
Snapseed Photo Edit for Professional Results
Professional-looking results depend more on controlled adjustments than the number of tools used. A simple combination of exposure correction, balanced color, selective enhancement, and careful sharpening can produce a stronger image than multiple heavy filters.
Pay attention to the photograph’s purpose, subject, lighting, and composition. A portrait may require natural skin tones, while a landscape can benefit from stronger texture. Matching the editing technique to the subject creates more convincing results.
Frequently Asked Questions
What is Snapseed photo edit?
Snapseed photo edit is the process of improving photographs using Snapseed’s editing tools. Users can adjust lighting, color, detail, perspective, and other image elements.
Is Snapseed good for professional photo editing?
Yes. Snapseed offers advanced controls such as Curves, Selective adjustments, Healing, Brush, and Perspective. These tools can support detailed mobile photo editing.
Is Snapseed easy for beginners?
Snapseed has a user-friendly interface that beginners can learn gradually. Starting with Tune Image, Crop, Details, and White Balance can help users understand the basic editing workflow.
Can Snapseed edit portrait photos?
Yes. Snapseed includes tools designed for portrait editing, along with selective adjustments that can improve specific areas while keeping the rest of the photograph unchanged.
Can Snapseed remove unwanted objects?
The Healing tool can remove many small unwanted elements from photographs. Results depend on the size, position, and complexity of the object being removed.
How can I improve photo quality in Snapseed?
Use exposure, contrast, highlights, shadows, white balance, Details, and selective adjustments carefully. Moderate changes generally produce a more natural and polished result.
Does Snapseed support RAW photos?
Snapseed supports RAW editing on compatible devices and can provide additional control over photographs captured in supported RAW formats.
Can Snapseed edit photos for social media?
Yes. Snapseed can crop, resize, enhance, and color-correct photographs for social media. Different aspect ratios can be selected depending on the intended platform.
Is Snapseed suitable for landscape photography?
Yes. Tools such as Tune Image, Curves, Details, Selective, and Perspective can improve landscapes by refining exposure, color, texture, and composition.
How can I make Snapseed edits look natural?
Use small adjustments and avoid excessive saturation, sharpening, structure, or contrast. Compare the edited image with the original regularly to maintain a natural appearance.
Conclusion
Snapseed photo edit provides a practical mobile workflow for improving photographs with detailed control over exposure, color, composition, sharpness, perspective, and local adjustments. Its combination of simple and advanced tools makes it suitable for many photography styles.
The key to better results is moderation and consistency. Start with fundamental corrections, use local tools for precision, apply creative effects selectively, and always compare the finished image with the original.
