

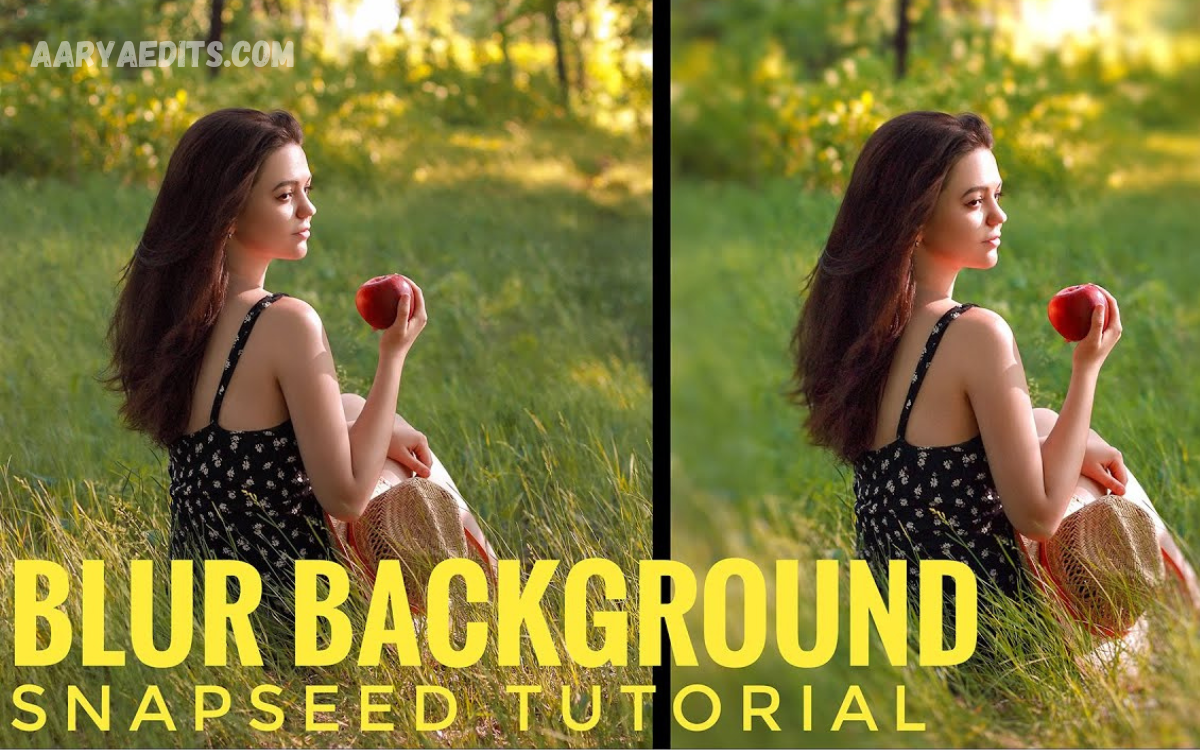
Creating a professional-looking background blur can instantly make your photos stand out, and Snapseed is one of the best free photo editing apps for achieving this effect. Whether you’re a beginner learning mobile photo editing or an experienced photographer looking to enhance portraits, product photos, or landscape images, Snapseed offers powerful blur tools that are easy to use.
You’ll learn how to apply blur effects with precision, adjust blur intensity, control transition areas, and create natural-looking depth in your photos. The guide also covers practical tips to avoid common mistakes, helping you produce high-quality edits without making the blur appear artificial.
What Is the Snapseed Blur Effect?
The Snapseed Blur Effect is primarily powered by the Lens Blur tool. It simulates the shallow depth of field created by DSLR cameras by keeping the subject sharp while softly blurring the surrounding background.
The blur effect is commonly used for:
- Portrait photography
- Product photography
- Food photography
- Nature photography
- Social media posts
- Professional branding images
- Travel photography
The result is a cleaner, more professional-looking photograph that naturally directs the viewer’s attention toward the main subject.
Why Use Snapseed for Blur Effects?
Snapseed has become one of the world’s favorite mobile editing applications because it combines professional features with a beginner-friendly interface.
Key advantages include:
- Completely free
- No advertisements
- Professional editing tools
- High-quality image processing
- Easy user interface
- Non-destructive editing
- Supports RAW images
- Available on Android and iPhone
Unlike many editing apps that lock premium blur tools behind subscriptions, Snapseed offers advanced blur controls at no cost.
Before You Begin Editing
For the best blur effect, start with a high-quality image.
Keep these tips in mind:
- Use high-resolution photos.
- Ensure your main subject is clearly visible.
- Avoid heavily compressed images.
- Capture photos in good lighting.
- Keep the subject separated from the background whenever possible.
Good original photos always produce better editing results.
Step 1: Install and Open Snapseed
If you haven’t already installed Snapseed:
- Download Snapseed from the Google Play Store or Apple App Store.
- Open the application.
- Tap the “+” icon.
- Select the image you want to edit.
Your selected photo will appear inside the editing workspace.
Step 2: Access the Lens Blur Tool
After opening your photo:
- Tap Tools.
- Scroll down.
- Select Lens Blur.
This tool instantly applies a default blur effect to your image.
A circular focus area appears over the photo.
Step 3: Position the Focus Area
The center circle determines which part of your image remains sharp.
Simply drag the focus area onto your subject.
For example:
- Place it over a person’s face.
- Position it on a product.
- Center it on a flower.
- Focus on an animal.
Everything outside this area gradually becomes blurred.
Step 4: Resize the Blur Area
Use two fingers to pinch inward or outward.
This changes the size of the focused area.
A larger circle keeps more of the image sharp.
A smaller circle creates a stronger portrait effect.
Adjust the size according to your subject.
Step 5: Adjust Blur Strength
Swipe vertically until you see Blur Strength.
Swipe horizontally to increase or decrease it.
Professional recommendations:
- Portraits: 20–35
- Products: 15–30
- Food photography: 20–40
- Landscape emphasis: 10–20
Avoid excessive blur because it often looks artificial.
Natural-looking edits always appear more professional.
Step 6: Control Transition Smoothness
Snapseed allows you to adjust how gradually the blur fades.
Choose Transition.
Increase the transition for:
- Soft portraits
- Wedding photos
- Lifestyle photography
Lower transition values create stronger edges between focused and blurred areas.
A smoother transition usually looks more realistic.
Step 7: Add Vignette
The Lens Blur tool also includes a vignette option.
A vignette slightly darkens the edges of the photo.
Benefits include:
- More attention on the subject
- Better visual depth
- Professional appearance
- Cinematic style
Use subtle vignette settings for the best results.
Step 8: Preview Your Edit
Tap and hold the image.
Snapseed displays the original photo.
Release your finger.
The edited version returns.
Compare both versions carefully before saving.
Professional editors constantly compare before-and-after images.
Step 9: Save Your Photo
Once satisfied:
Tap Export.
Choose one of the following:
- Save
- Save a Copy
- Export
- Export As
Saving a copy preserves your original image.
This allows future editing without quality loss.
Read Also: Free Instagram Lightroom Presets for Stunning Photo Edits
Creative Ways to Use Blur Effects
Blur is not limited to portraits.
It can improve many photography styles.
Portrait Photography
Blur removes distractions and highlights facial expressions.
Product Photography
Create clean product images for online stores.
Customers naturally focus on the item.
Food Photography
Blurring backgrounds makes meals appear more attractive.
Restaurants and bloggers frequently use this technique.
Nature Photography
Blur surrounding leaves or flowers while emphasizing wildlife.
Travel Photography
Highlight monuments while softening busy tourist crowds.
Professional Editing Tips
Professional photographers follow several important principles.
Keep Blur Natural
Avoid maximum blur settings.
Subtle editing produces realistic results.
Focus on Eyes
For portraits, keep the eyes perfectly sharp.
This creates stronger emotional impact.
Maintain Image Balance
The blur should complement the photo.
It should never overpower the subject.
Use High Resolution
Higher-quality images preserve details after editing.
Avoid Over Editing
Less is often more.
Professional edits usually appear simple.
Common Mistakes to Avoid
Many beginners make similar mistakes.
Using Too Much Blur
Extreme blur appears fake.
Poor Subject Placement
Incorrect focus positioning reduces image quality.
Blurring Important Details
Keep faces, products, and key objects sharp.
Ignoring Lighting
Blur cannot fix poor lighting.
Always start with a well-exposed photo.
Saving Over the Original
Always save a copy first.
Additional Snapseed Tools That Work Well with Blur
Blur becomes even more effective when combined with other Snapseed features.
Tune Image
Adjust:
- Brightness
- Contrast
- Saturation
- Ambiance
- Highlights
- Shadows
Selective Tool
Enhance only certain areas.
Healing Tool
Remove unwanted objects before applying blur.
Details
Sharpen the subject while keeping the background soft.
Curves
Improve color depth and dynamic range.
Combining these tools creates truly professional edits.
Benefits of Using Snapseed Blur Effects
Using blur correctly offers several advantages.
These include:
- Professional appearance
- Better storytelling
- Improved subject focus
- Cleaner backgrounds
- Increased engagement on social media
- Enhanced visual depth
- DSLR-style results using a smartphone
For influencers, bloggers, photographers, and businesses, these improvements can significantly enhance visual branding.
Is Snapseed Better Than Other Blur Apps?
Snapseed competes with many popular editing applications.
Its advantages include:
- Completely free
- No watermark
- Professional Lens Blur
- Advanced editing tools
- RAW editing support
- Fast performance
- Excellent image quality
For many users, it delivers premium-quality results without requiring a paid subscription.
Frequently Asked Questions
Is Snapseed free to use?
Yes. Snapseed is completely free for both Android and iOS users.
Which tool creates the blur effect in Snapseed?
The Lens Blur tool is the primary feature used to create realistic background blur.
Can Snapseed create DSLR-style photos?
Yes. When used correctly, Lens Blur can simulate a DSLR depth-of-field effect.
Does Snapseed reduce photo quality?
No. Snapseed maintains excellent image quality, especially when editing high-resolution photos.
Can I blur only specific parts of a photo?
Yes. You can position and resize the focus area to blur only selected regions.
Is Snapseed suitable for beginners?
Absolutely. Its intuitive interface makes it easy for beginners while still offering advanced features for professionals.
Can I edit RAW photos in Snapseed?
Yes. Snapseed supports RAW image editing, giving photographers greater control over adjustments.
What is the ideal blur strength?
For most photos, a blur strength between 20 and 35 creates a natural, professional appearance.
Can I undo edits in Snapseed?
Yes. Snapseed includes a non-destructive editing workflow, allowing you to review and modify edits before exporting.
Is Snapseed good for social media content?
Yes. It is one of the best free apps for creating professional-quality images for Instagram, Facebook, Pinterest, LinkedIn, and other social media platforms.
Conclusion
The Snapseed Blur Effect Tutorial: A Complete Step-by-Step Guide demonstrates that creating professional-looking photos doesn’t require expensive cameras or advanced editing software. With Snapseed’s Lens Blur tool, anyone can produce realistic background blur, emphasize subjects, and give images a polished, DSLR-inspired look using only a smartphone.
By following the steps outlined in this guide selecting the right image, adjusting blur strength, refining transition areas, and combining blur with additional editing tools you can significantly improve the quality of your photos.
